How to setup

Introduction
Thank you for joining the Octopod ecosystem. This installation guide will allow you, step by step, to install all the Octopod software allowing the use of our games.
Please follow this step-by-step guide in order to have an optimal installation.
Octopod: Play is a game launcher that allows you to play the multiplayer games that make up the catalog. Thanks to this tool, you will be able to set up and launch a game on all the machines concerned in one click.
Octopod:Play communicates with the server and player machines through a small agent called "Daemon". This agent must stay open all the time on these machines, to be able to receive requests (such as launching a game on this machine).
This guide presents how to install these software programs on your machines, in order to use the Octopod games catalog.
Installation and setup of the OctopodPlay software
Step 1 Setting up user accounts
Your Octopod:Insight account has been successfully created.
You have received an email with a link to activate your Octopod:Insight account and enter your password. If you did not receive it, please check your spam.
If you did not receive anything, please contact support
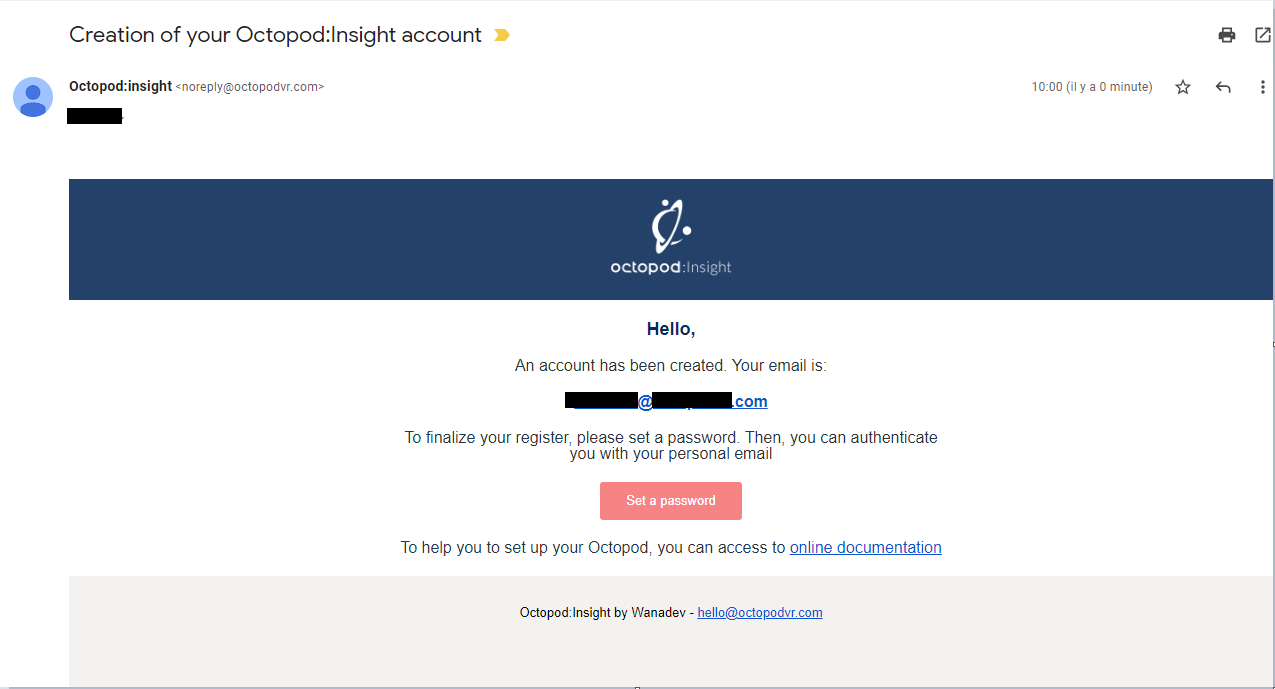
Click on the "Set a password" button to create your Octopod:Insight password. Once set, please log in with this email address and the password you just set.
Once connected, you will be asked to create a new password for your Octopod:Play account. Indeed, access to Octopod:Insight and Octopod:Play are not necessarily intended for the same users (manager, game master...).
The identifier (not your email address) of this account has been sent to you by our teams when you created your account. It is also visible on the Octopod:Insight homepage "Octopod:Play Login".

You also have the possibility to choose the password of your Octopod:Play account via an email sent to the same address.
1- Your Octopod:Insight account, a website allowing the visualization of your LBE's consumption, as well as your place dedicated to all documentation, game guides, and communication packs. To log in to this account: your email address + password are defined the first time.
2- An Octopod:Play account (launcher account) that will be installed on the computer used by your Game Master, which allows you to launch our games and manage your spaces. To connect to this account: login + password defined in a second step.
You have to fill in a different password for Octopod:Insight and Octopod:Play.
Step 2 Download the launcher and the script
On your Launcher machine (Octopod:Play machine), go to Octopod:Insight to download the installer (named "updater.exe") by clicking on "Octopod:Play" next to "Documentation”

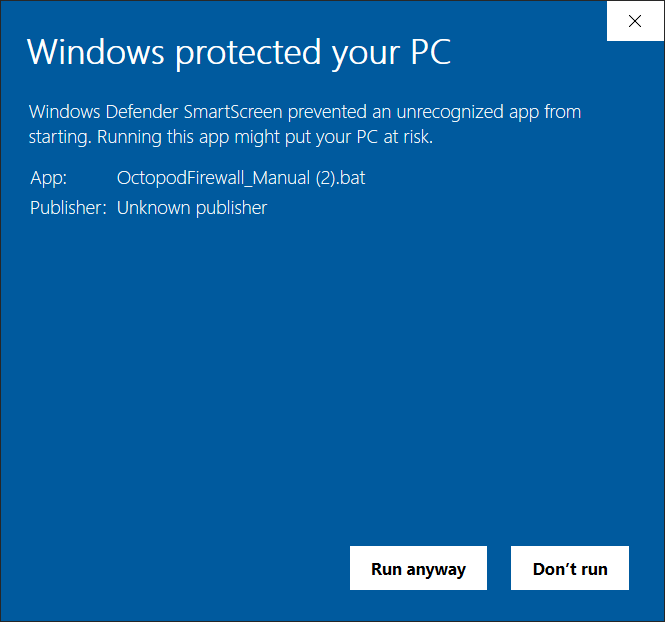
Then, still from your Launcher machine, download: Network port opening. You need to put it in a shared folder or copy it to all your machines, then run it from all your machines.
- 14001
- 11111
- from 4242 to 4754
- from 7777 to 8289
- from 49152 to 65535
On the Launcher:
- Output ports 80 and 443 (TCP)
- Port 5984 in/out (TCP)
- Port 3000 inbound (TCP)
- Ports 4242 to 4299 in/out (TCP and UDP)
- Ports 5900 and 5901 inbounds (TCP)
On the Server and Players workstations
- Output ports 80 and 443 (TCP)
- Ports 4242 to 4299 in/out (TCP and UDP)
- Ports 5900 and 5901 inbounds (TCP)
Step 3 Install the launcher
Once your Octopod:Play file is downloaded, go to the folder where the executable "Updater.exe" is downloaded and right-click on it then choose: "Run as administrator" to launch it.
A "User Account Control" window will open. Accept the installation by clicking on "Yes". Then, Octopod: Play will be installed and will open automatically.
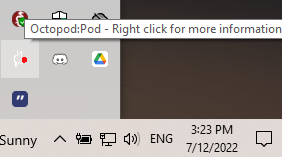
To easily access Octopod: Play later, the shortcut "Octopod - Launcher" has been automatically created on your desktop. An icon is also available in the Windows taskbar (bottom right in the hidden icons).
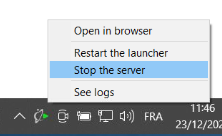
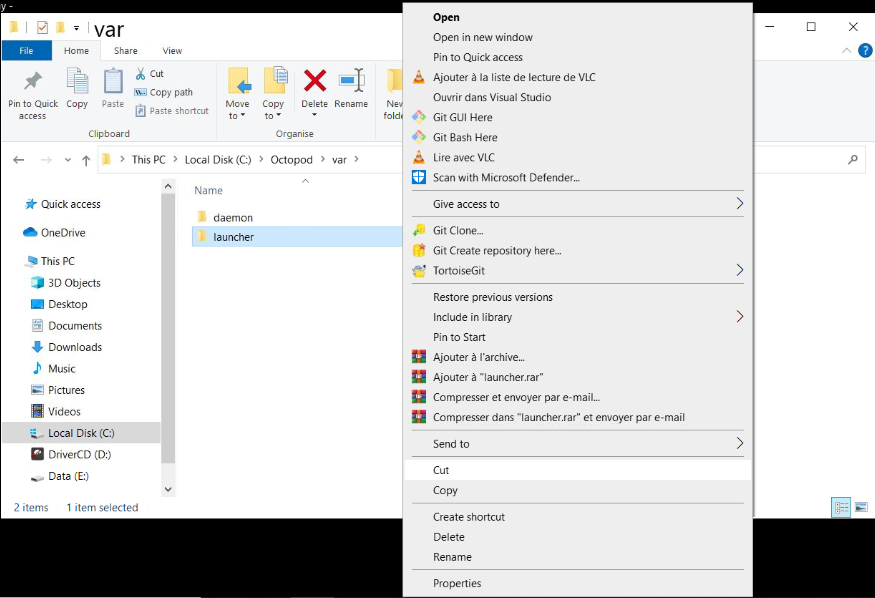
By right-clicking on this icon, you have the following list of actions:
![]()

Closing the launcher window does not stop your launcher. To turn it off, please stop the server from the logo above.
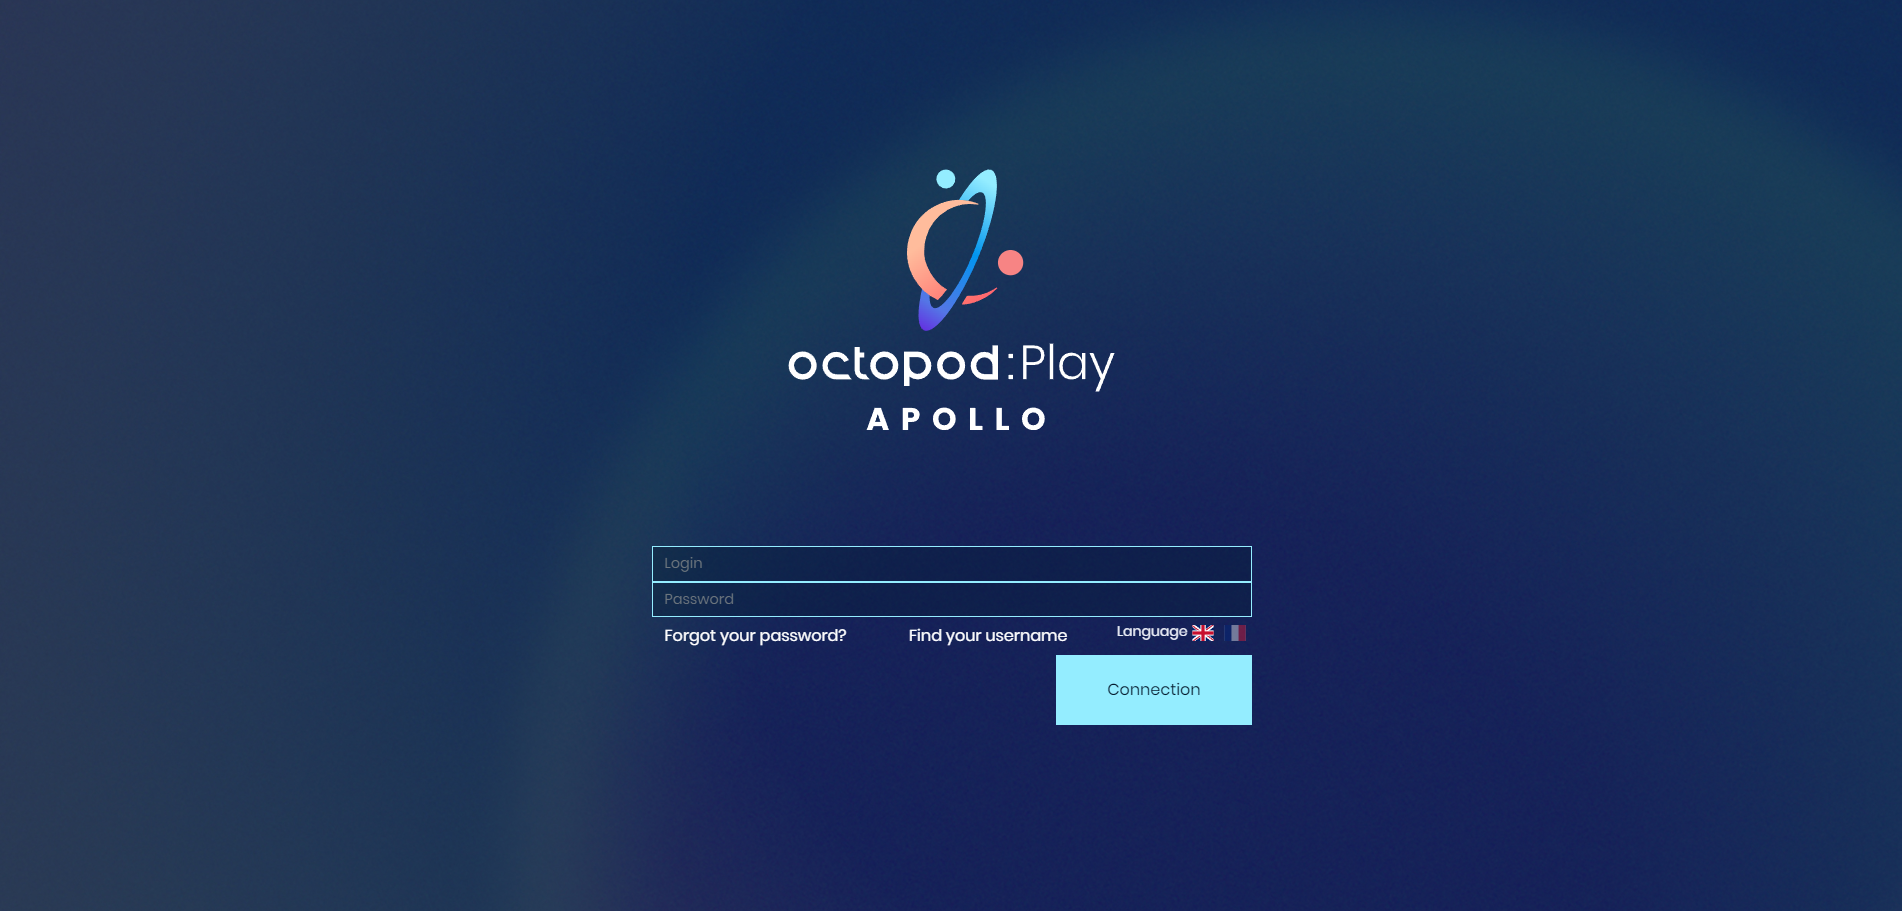
Step 4 Connect to the launcher
Once the installation is complete, you must log in with your Octopod:Play account credentials.
It is possible to use the multipoint access by connecting to the IP of your PC launcher from an Internet browser of a machine on the same network followed by :3000 Example: 10.0.95.200:3000
Step 5 Download and configure your player PCs and servers
Your Launcher PC must be connected via an Ethernet cable. Before continuing with the installation, make sure that your Launcher machine has a fixed IP and will never change it because all machines will then try to connect to it. If the Launcher changes its IP, the machines will no longer be accessible for launching games. If this happens, please follow these steps: “Change the IP of my player PCs”.
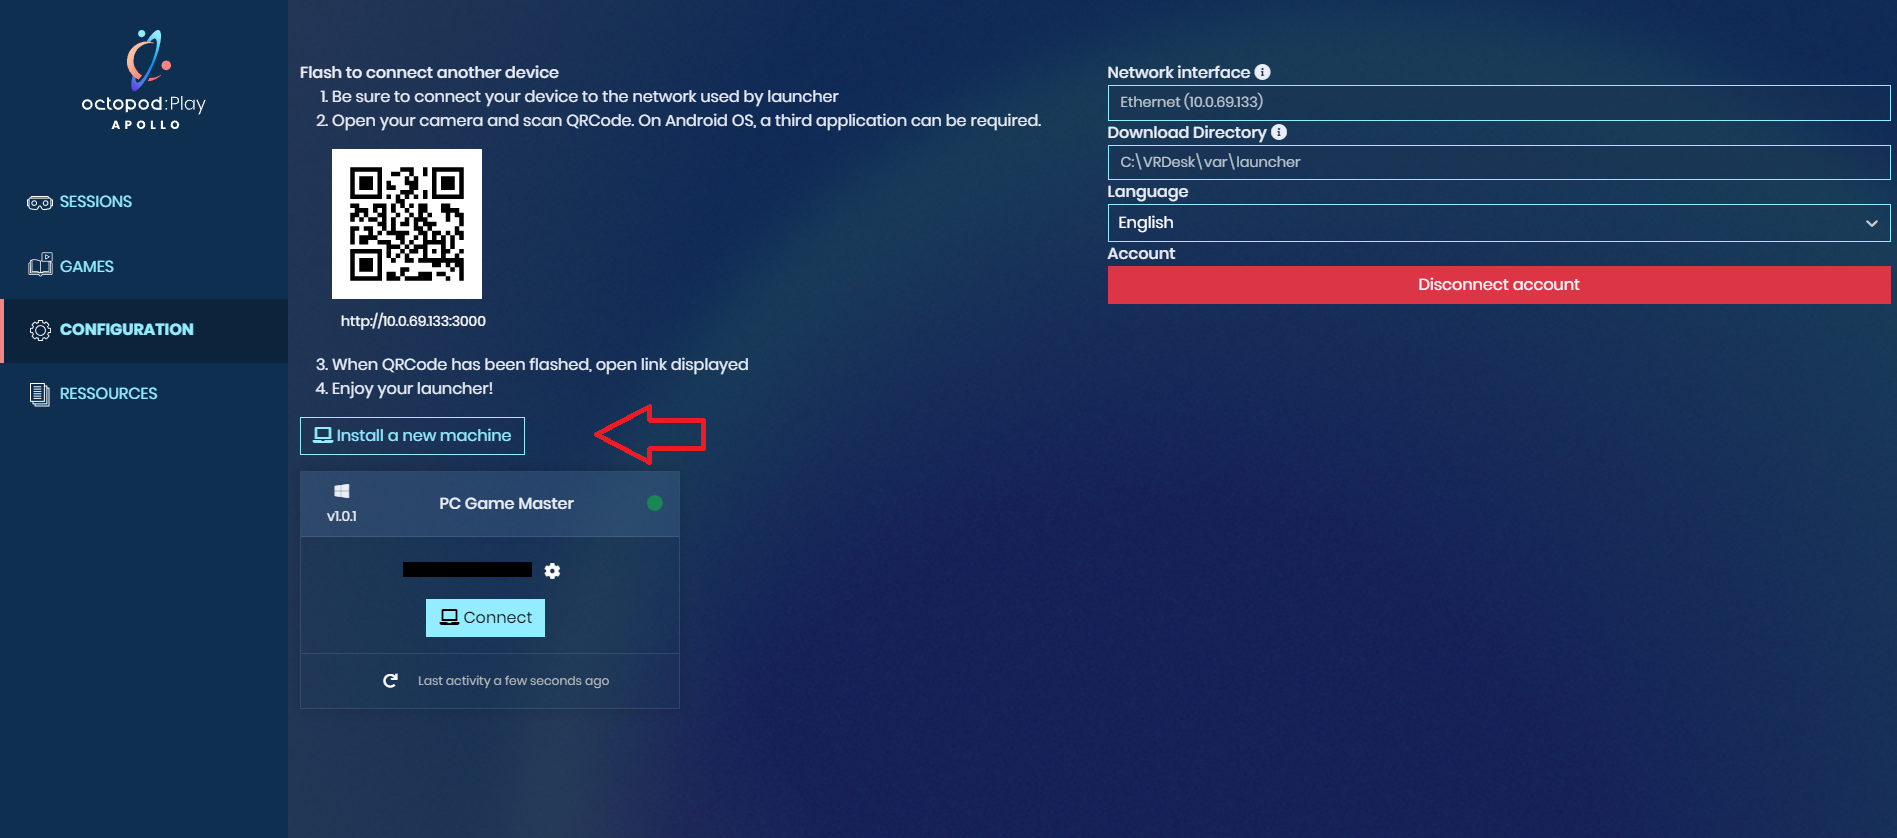
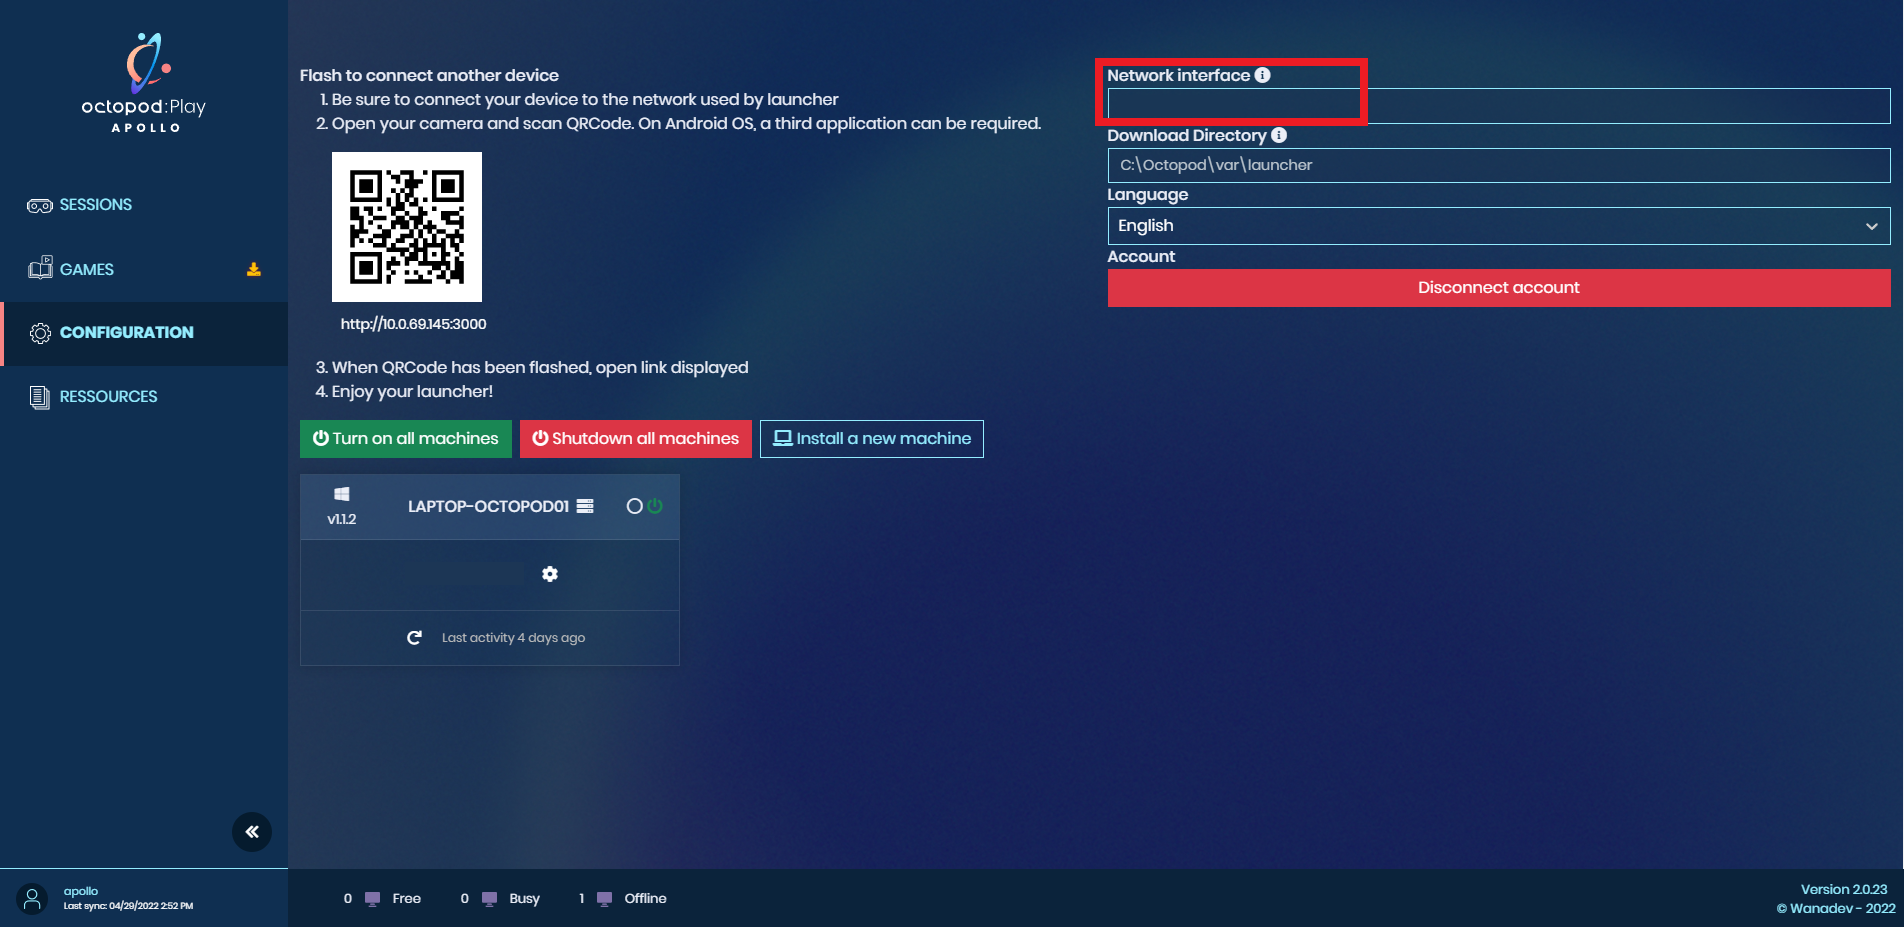
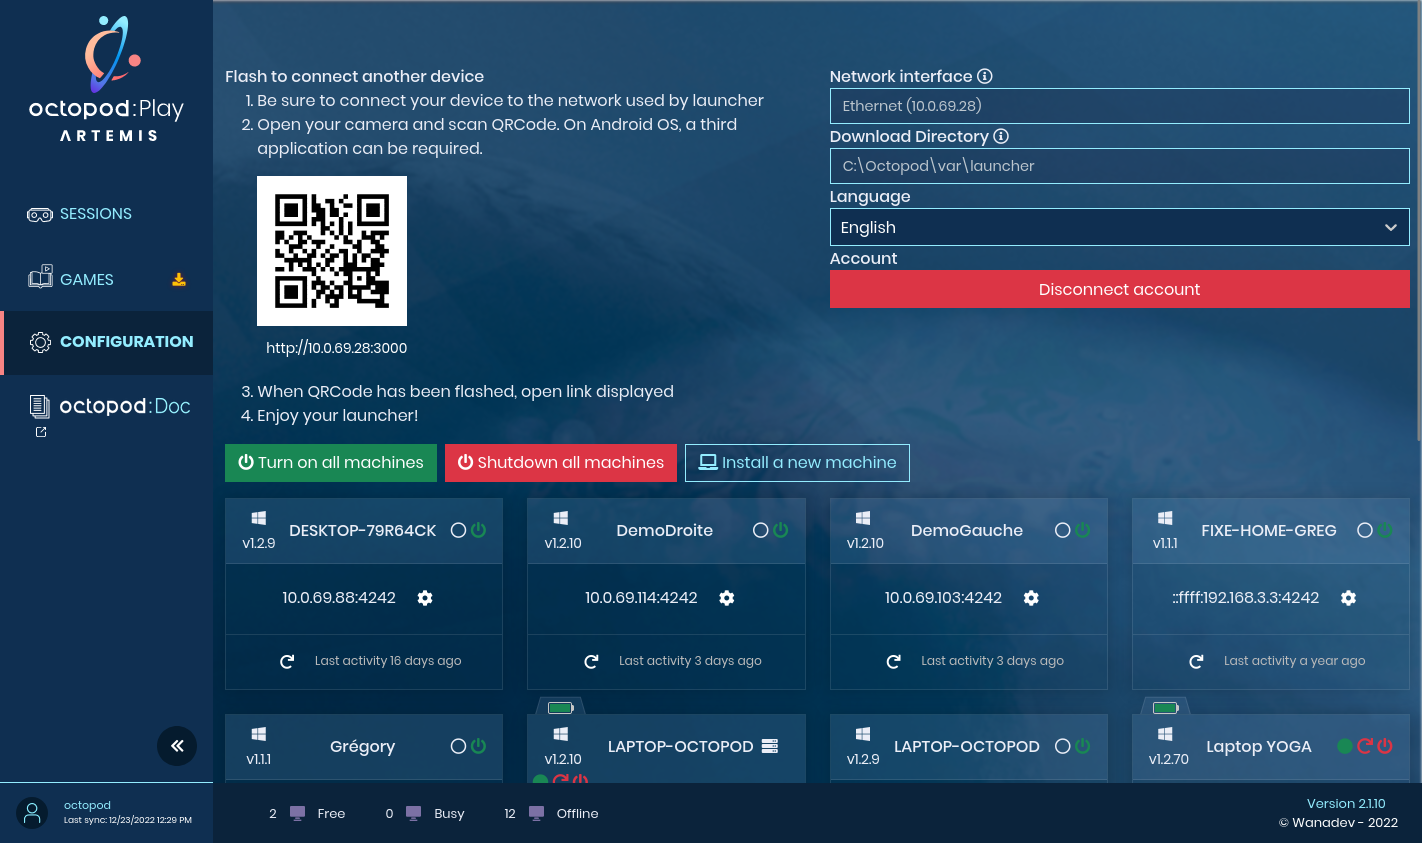
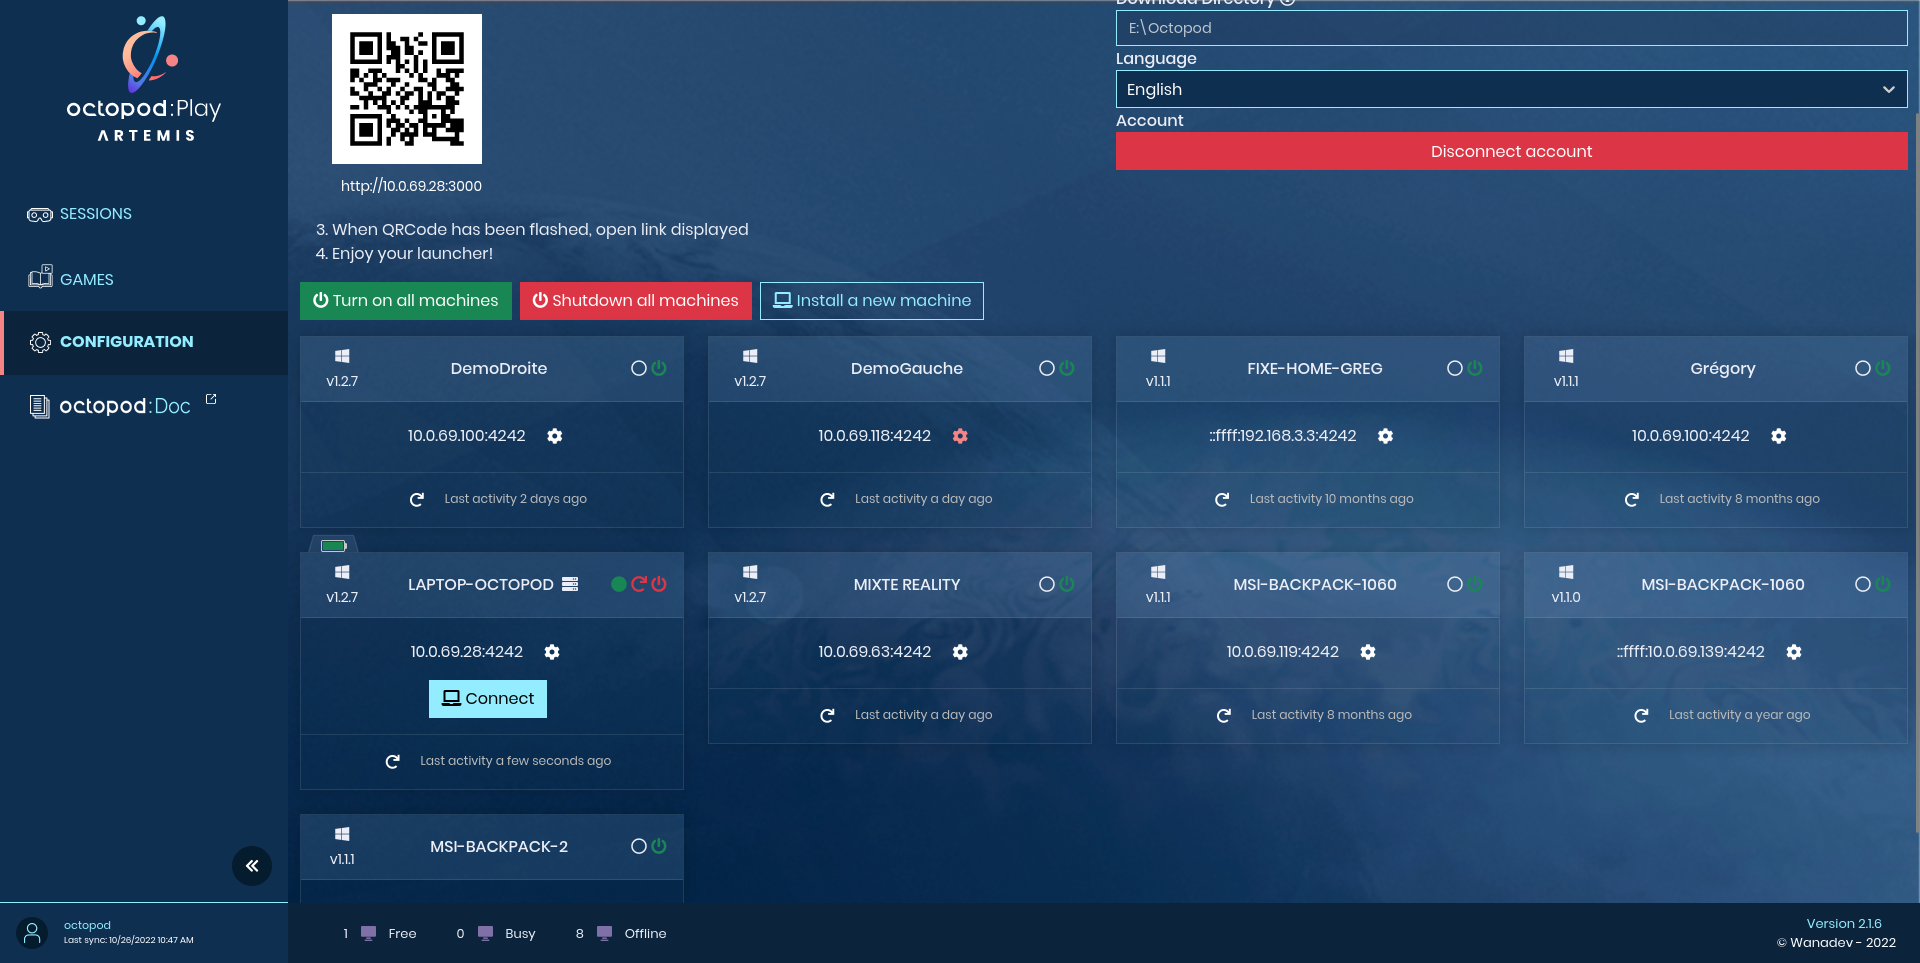
Once connected to Octopod: Play, go to the Configuration tab. Under Network Interface, you will find your IP (which must be fixed, the machine connected in ethernet).
In Octopod: Play, go to the Configuration tab, and click on the Install a new machine button. Choose a folder where to place your download.
Once the download is finished, unzip the downloaded daemon.zip archive (right click > Extract All).
To extract a folder, you can use third-party software like WinRAR or WinZip. Otherwise, Windows 10 and 11 offer the option "Extract all".
On Windows 10: Open the zipped folder, then click on extract at the top right of your window.
Then copy the whole extracted folder (which should contain the config.json and install.exe files) to each machine you want to be able to use to launch games (or to a shared folder, a USB key...): that is to say all your player machines, servers and the launcher machine included
Step 6 Install and run Octopod:Pod (daemon)
In order to install the daemon, all machines must have internet access at the time of installation.
Go to each machine, in the folder >daemon that you have copied, right-click on the file install.exe and choose "Run as administrator".

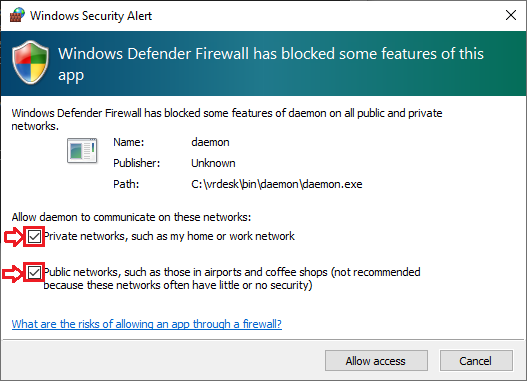
A User Account Control window opens. Accept the installation by clicking Yes. A Windows Security Alert window opens. Check the Private networks and Public networks boxes as shown in the following image, then allow access:
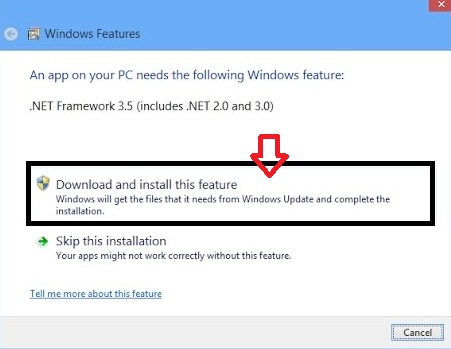
In order to install the daemon, Windows may ask you to install ".NET Framework 3.5". Click on "Download and install this feature". (see below)
You may also need to download DirectX Runtime manually: DirectX Runtime installer
The daemon installs itself, then opens automatically. Thereafter, the daemon will be automatically turned on at each startup of the machine.
A shortcut Octopod - Daemon is automatically created on the desktop of the machine. An Octopod icon is present in the taskbar of the machine when the Daemon is running.
At this point, the machine should appear in the launcher, in the Configuration tab, with a green dot indicating that it is connected.
Check if the machine is connected to the same local network as the Launcher machine. You can try to restart the machine. Please check if the selected IP is the right one by following this guide: "Change the IP of my player PCs".
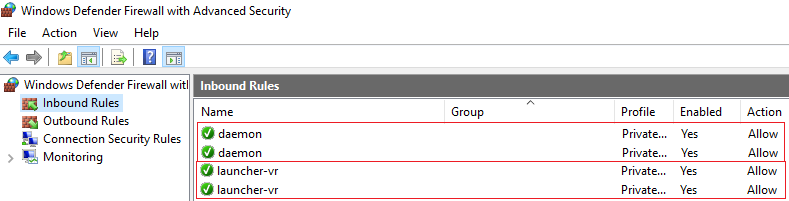
It means that the daemon cannot communicate with the launcher. Then check the rules for daemon and launcher in the advanced settings of the Windows Firewall (allow access on public and private networks to the daemon and launcher-VR rules).
Step 7 Wake-On-Lan Configuration
The "Wake-on-Lan" (abbr. WoL) allows you to start the machines of the park where the daemon is installed from your launcher. It is necessary to check that your motherboard/network has this feature and that it is activated.
On your motherboard manufacturer's website (e.g. ASUS) you will find a guide to enabling this feature in your computer's BIOS. (example).
To summarize
- One daemon on each computer (Launcher-Server-Players)
- A launcher installed on the PC launcher
Congratulations! You have correctly installed all your computers, players, servers, and launchers. The daemon folder (containing config.json and install.exe) used for the installation can be deleted after the installation.
Installation and setup of Octopod catalog games
Step 1: Configuration and installation of the games
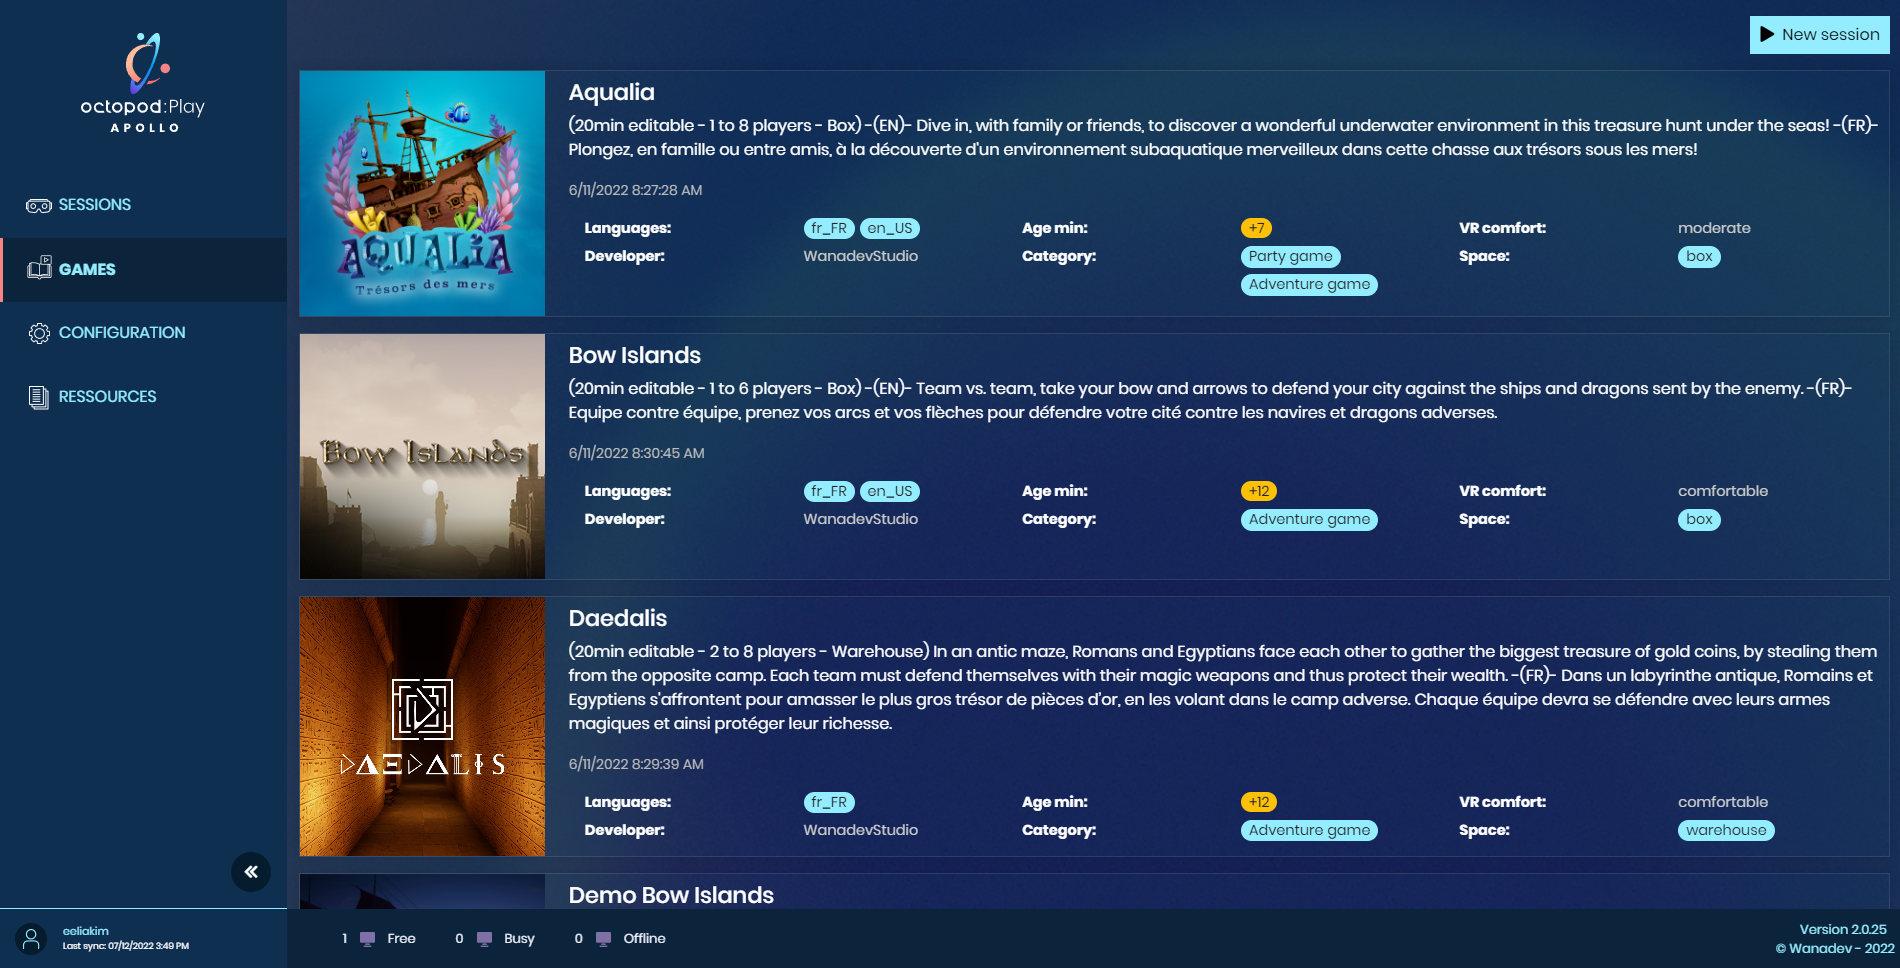
Go to the Games tab.
In this tab, you will have access to all the games available in your catalog. Please click on the game you wish to install.
Choose the version to install in the “Configure version” (by default the most recent is selected), then click on the “Download” button.
Once the version is downloaded, click on the “Install on machines” button. The machines must be connected to download the game. Once the game version is installed, you will see the screen below.
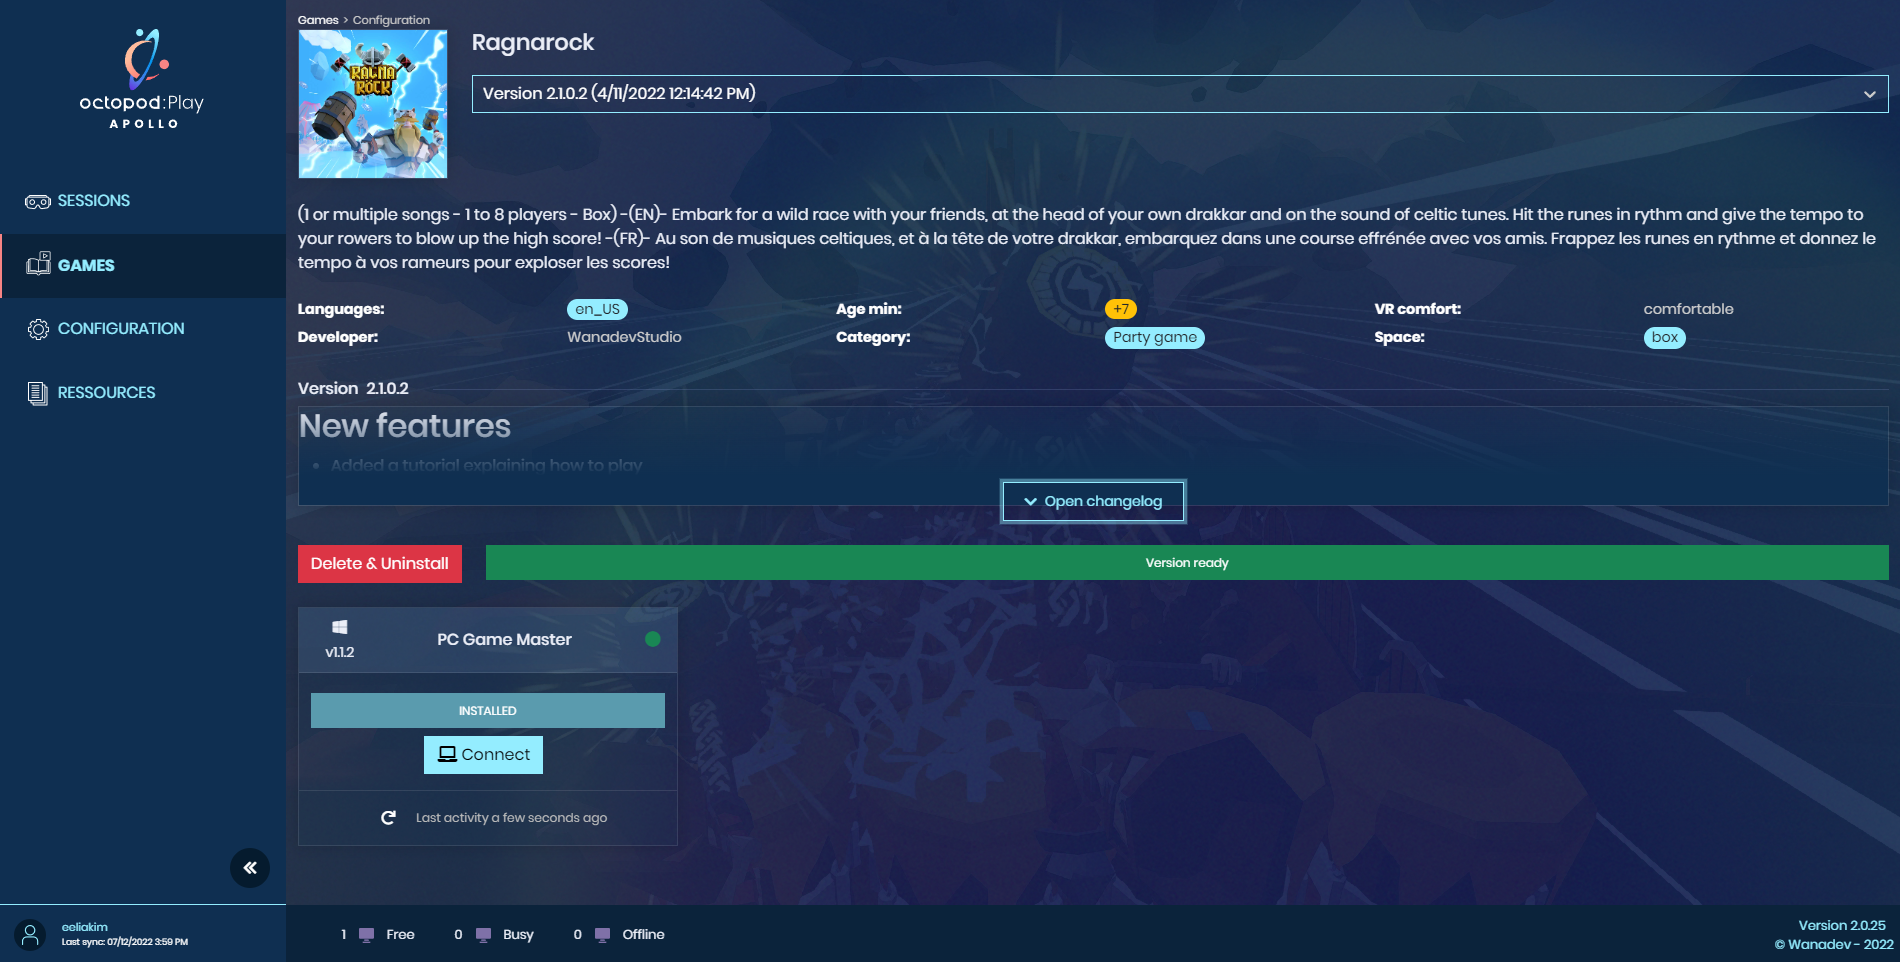
Congratulations, you have installed your first game!
You must perform the same action for each game you want to use.
To launch games, please refer to the Games Guides available on your Octopod:Insight documentation space, or on the Octopod user manual.
The Windows firewall will display a message on the Server machine asking you to allow the game.
It is very important to go to the machine you have selected as a Server and check Private AND public networks then Allow access (to be done each time you use a new version of a game or a new machine as a server PC).

As long as the authorization is not given on the server, the players will not be able to connect and the game will not start. On the player machines, if the firewall requests it, you can do the same.
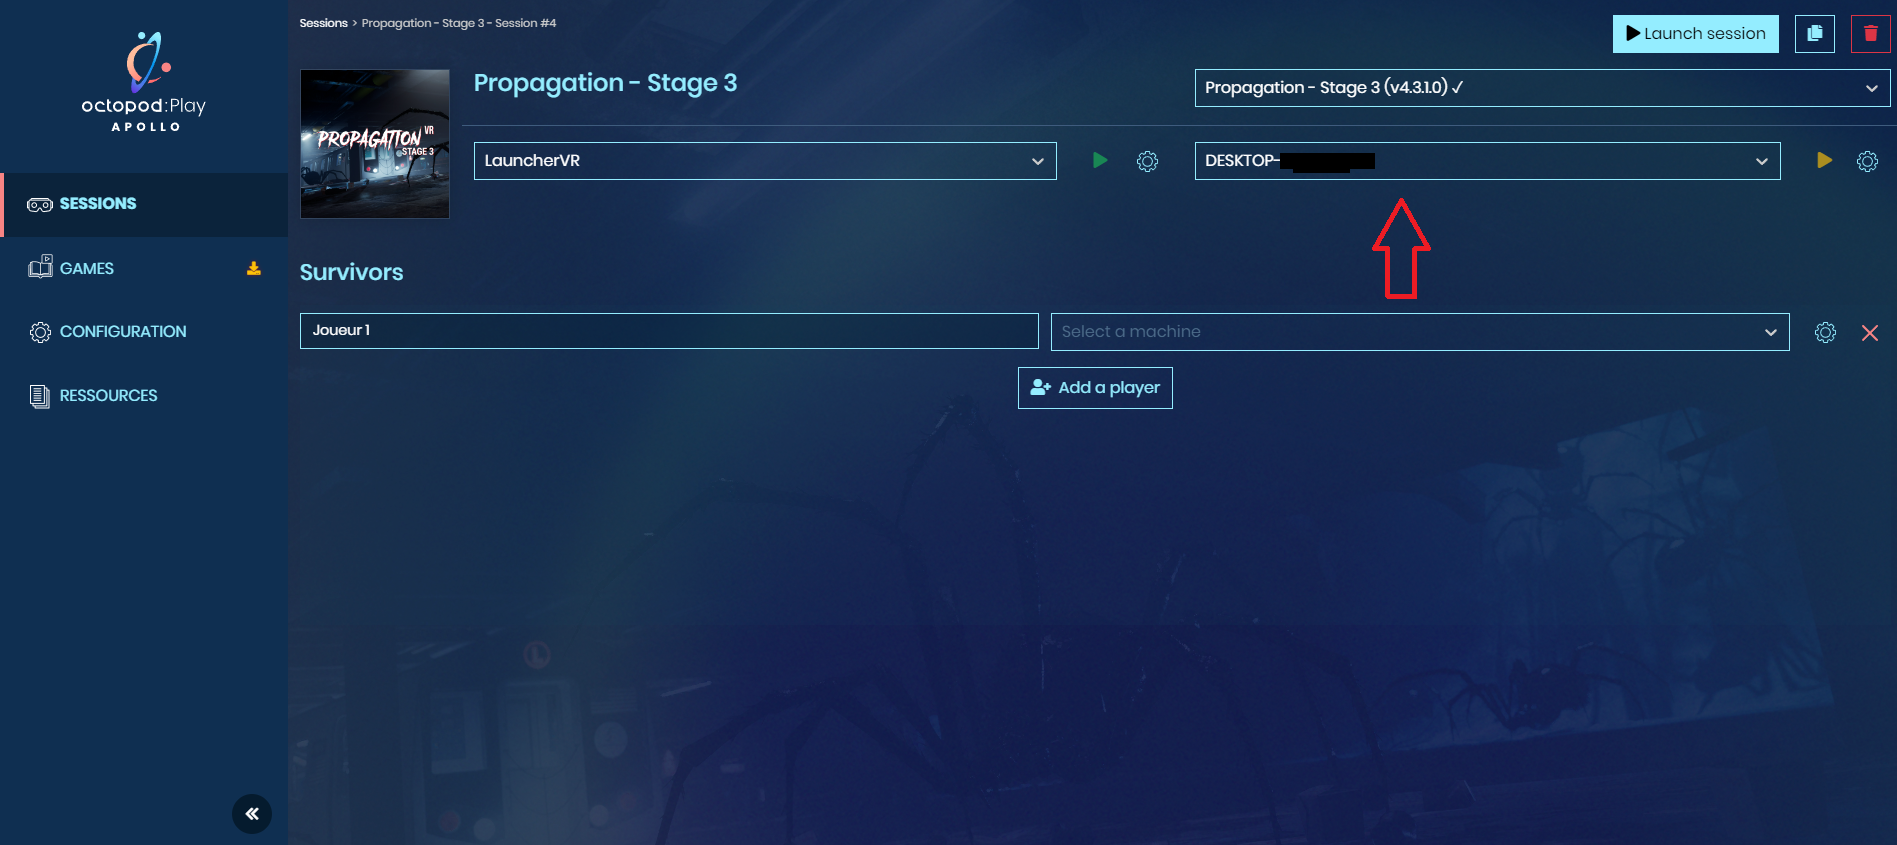
Step 2 Set up your first game
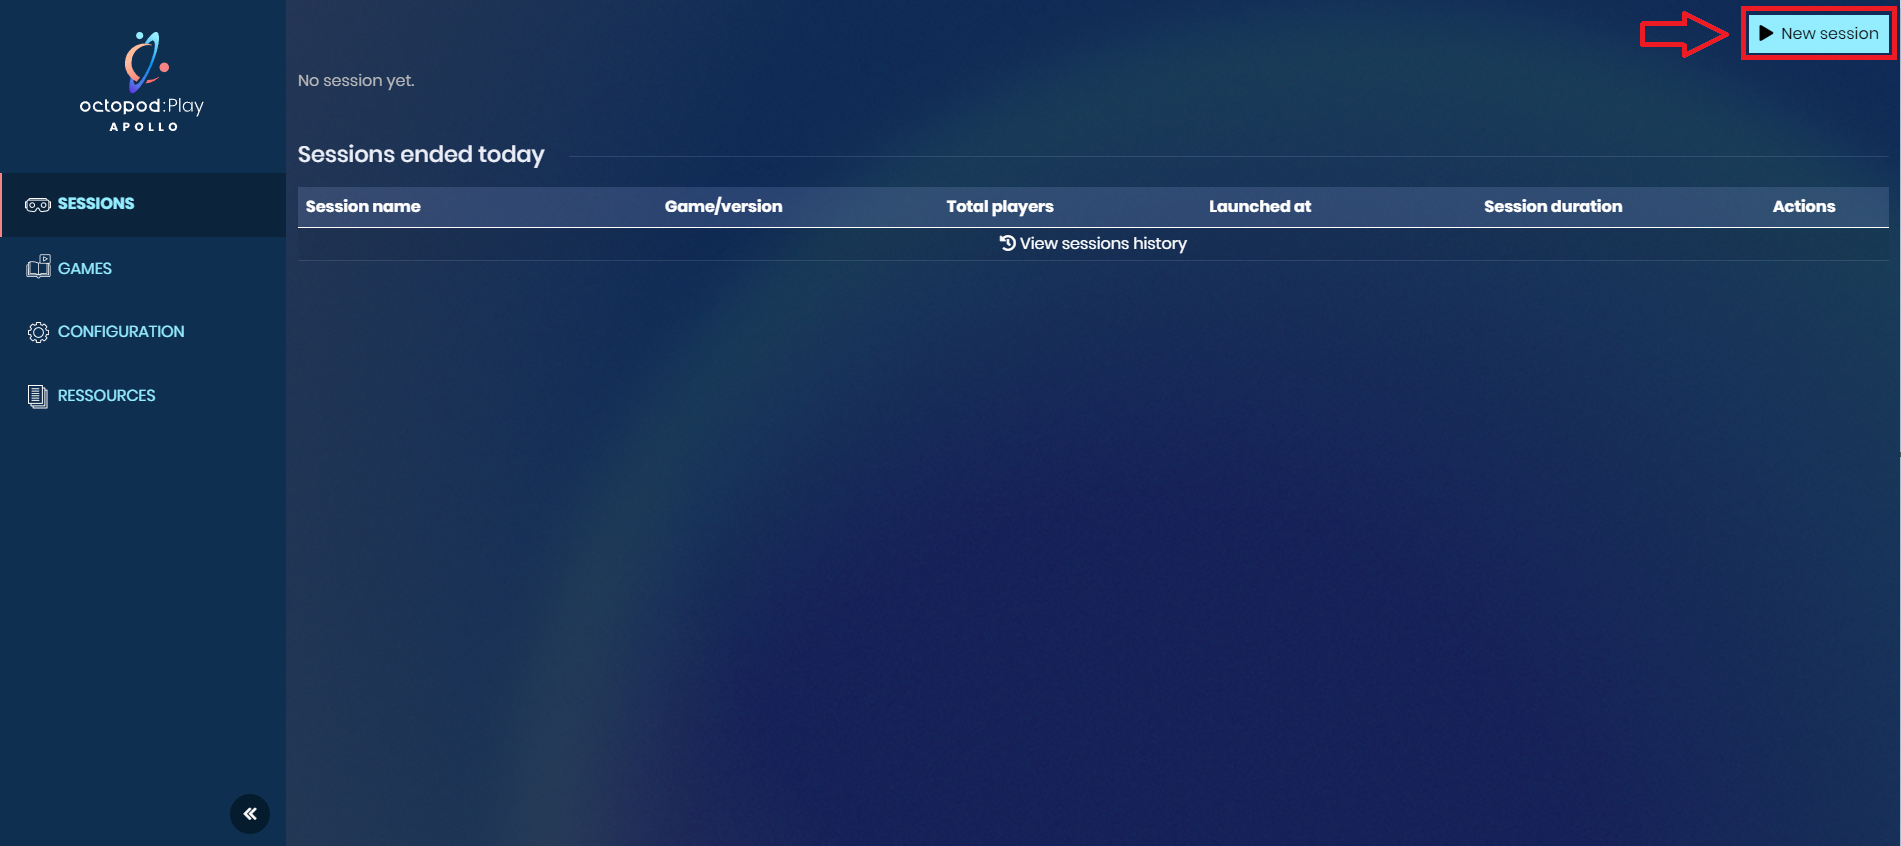
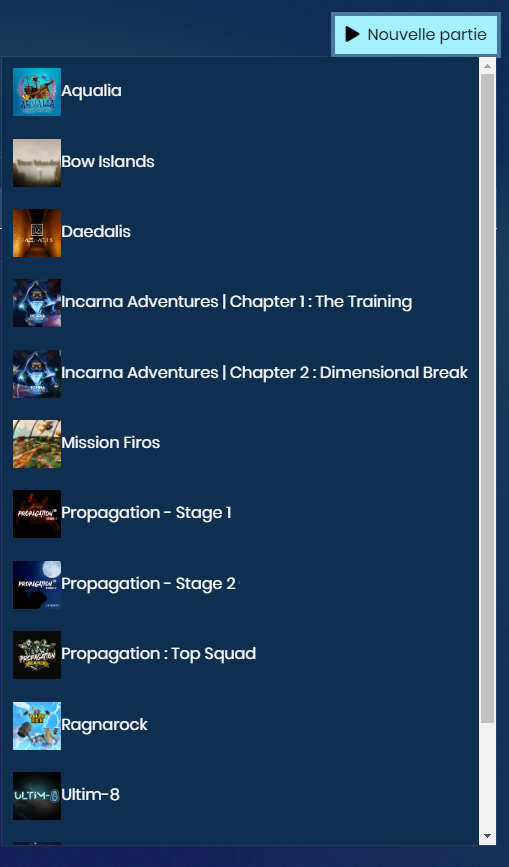
Click on the New Game button and choose a game.
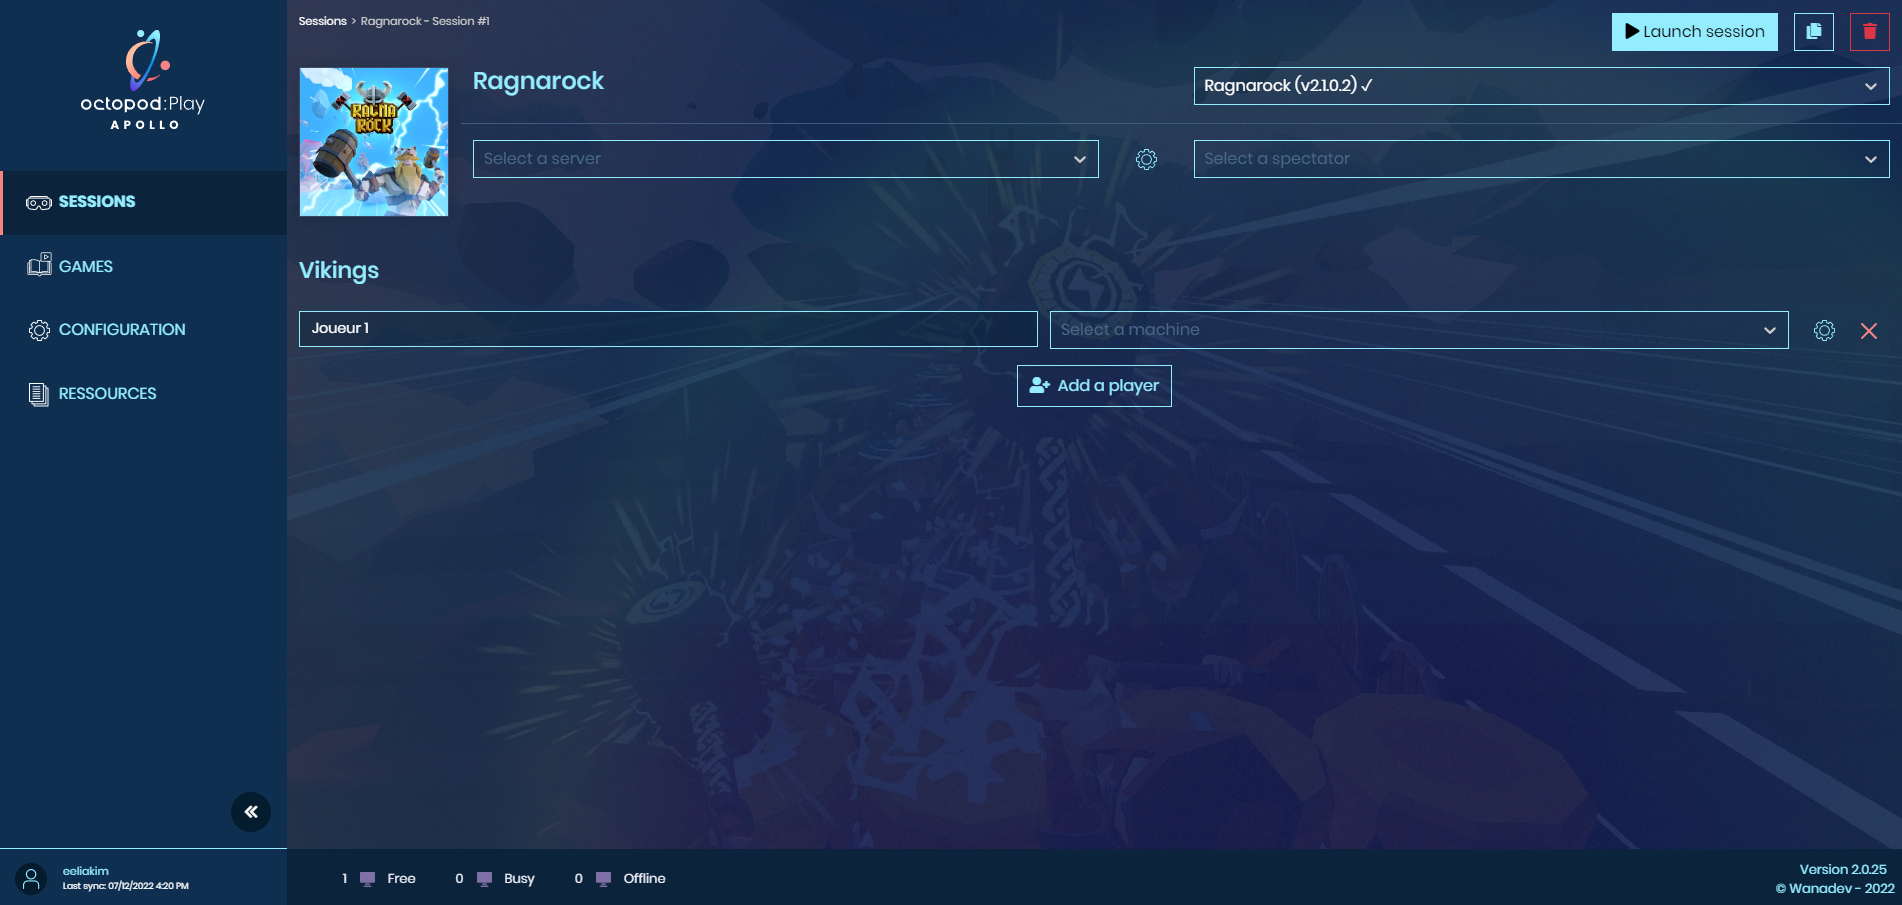
Once on the game page, check that the version of the game selected at the top right is the one you want.
Machines that do not have this version of the game installed will not be selectable for this game. If the desired machines do not appear, please check the status of the game installation in the "Games" tab
Then select a server from the drop-down list (choose the machine defined as Server).
You can run many different game servers at the same time on the same machine. However, for player and spectator PCs, there can only be one process per machine.
Example: We can therefore launch several games at the same time: 1 game of Propagation and 1 game of Bow Islands = 2 server processes on the server machine, and 2 players + 6 players = 8 player stations used.
Configuration of server settings
You can choose some configuration options for the game via the server settings (different for each game) via the button ![]() next to the server menu. A window will appear with the game options.
next to the server menu. A window will appear with the game options.
Example for Propagation:
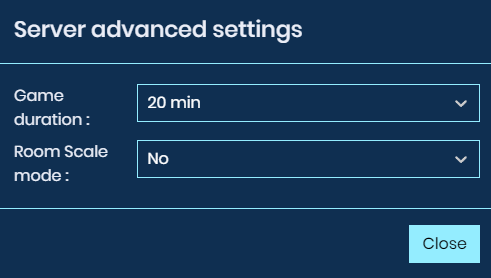
You can play it for 10 or 20 minutes, in box mode or free movement depending on your available space.
Then click on Add a player:
- Choose or add a player name
- Choice of the machine (with the version of the game installed)
- Configuration of the player possible via the
 button
Configuration of player settings
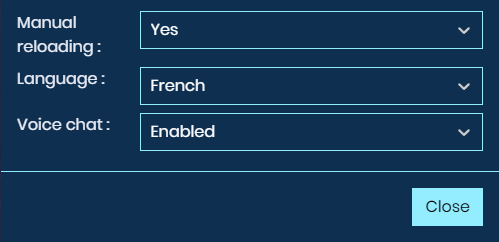
Here, these options can be configured independently for each player. This allows you, for example, to adapt the game session to a group with several kinds of needs.
For example, in a group with English and French speakers, you can play the game set in English and French in the same game.
For some games, there is the possibility to choose a Spectator machine (to be filled in next to the server choice).
Spectator settings
A spectator is a non-player view of the game that allows the Game Master to follow the progress of the game and help the players.
In some games, the spectator has debugging commands allowing them to move in the scene, to unblock the game in particular cases (see technical sheets of each game). It can be used to control the progress of the game for the operator, detect a problem, or simply broadcast a live game on another screen.
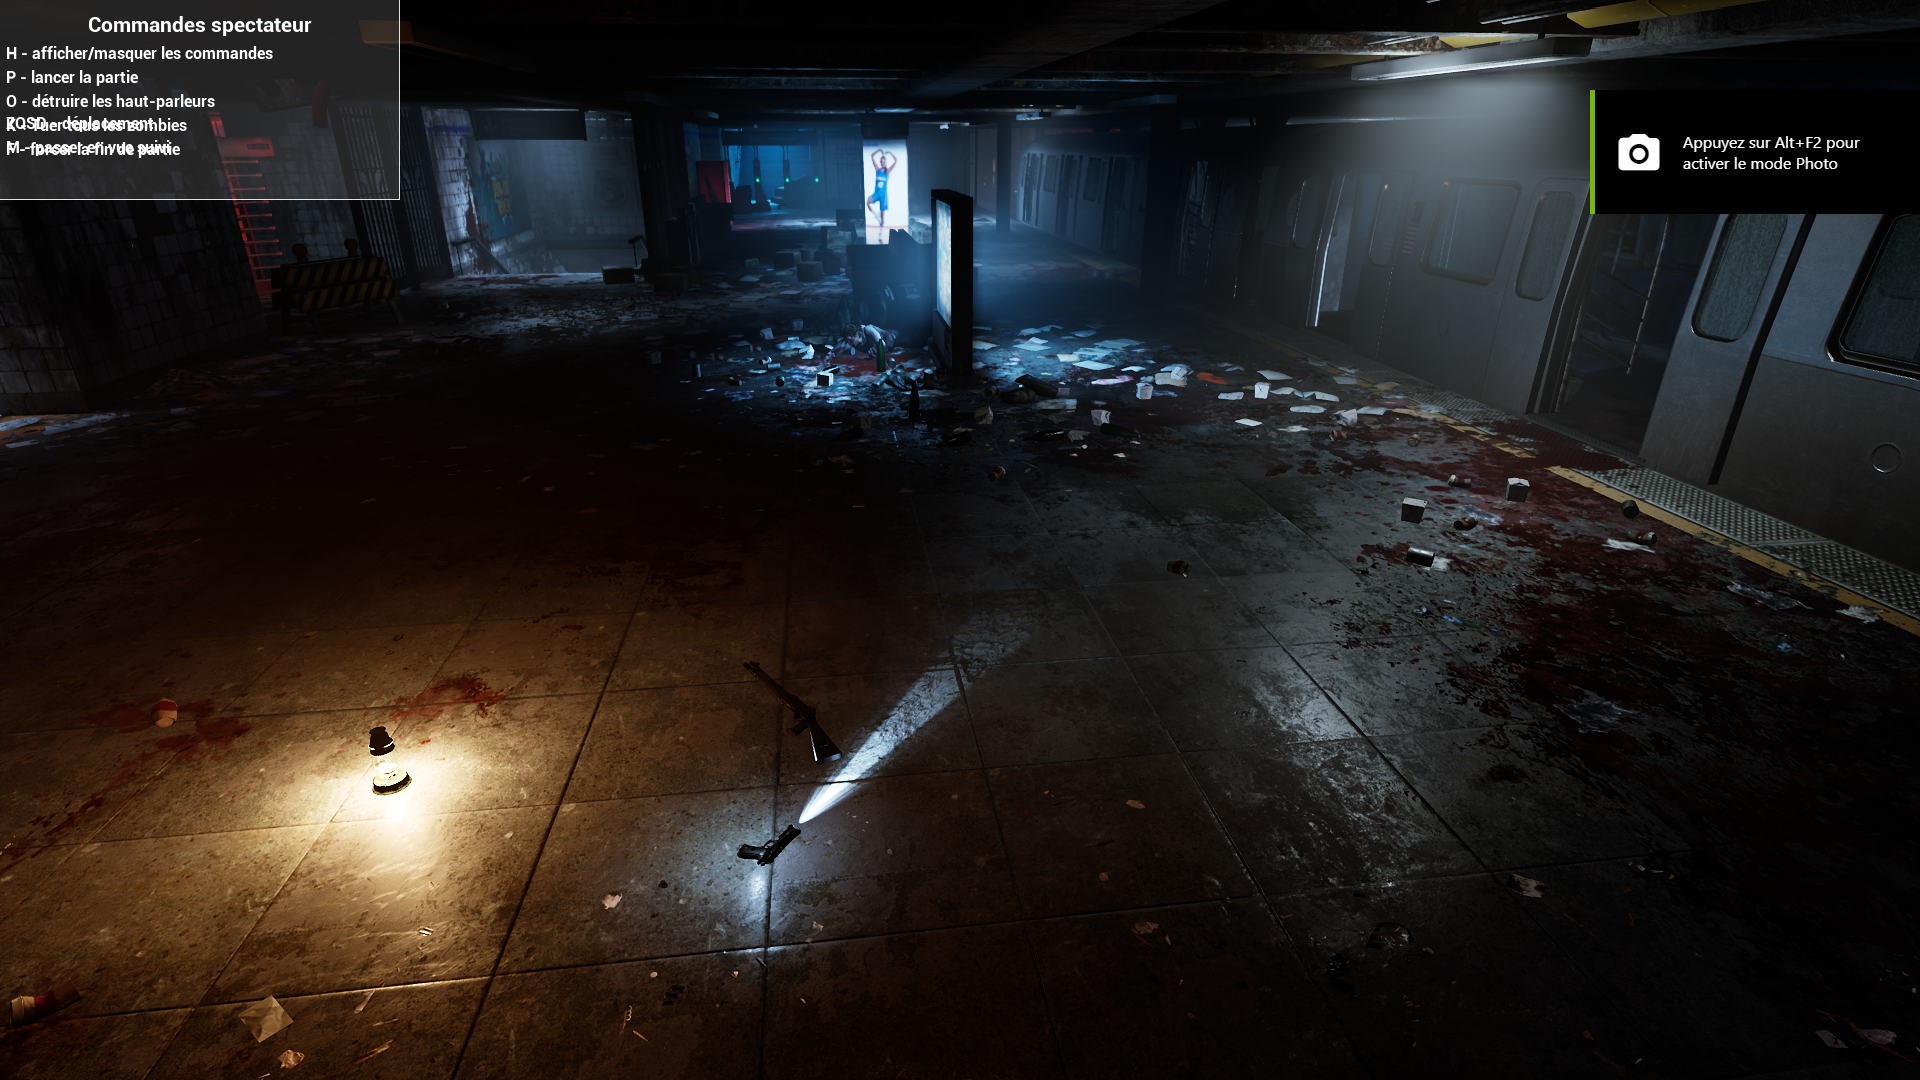 In the capture above, the spectator of the game Propagation stage 3.
Step 3 Launch your first game
Once your game is configured (see the previous step), you have 2 solutions to launch the game:
- Quick launch via the button

- OR Manual launch via the
 button (first the server, then the players)
 - To stop the game during the game, use the button

Otherwise, the server and the players are automatically stopped at the end of the game.
If a particular player is experiencing abnormalities in the game for some reason, sometimes stopping and restarting only that player (without leaving the server or other players) will solve the problem.
OctopodInsight OnBoarding
Welcome to Octopod:Insight! This very important tool will allow you to perform several actions and allows you to follow your monthly consumption. Moreover, it is your privileged place to find all the useful information!
On this first screen, you can click on the name of your launcher.

If you click on it, you will have direct access to the summary of your monthly consumption:
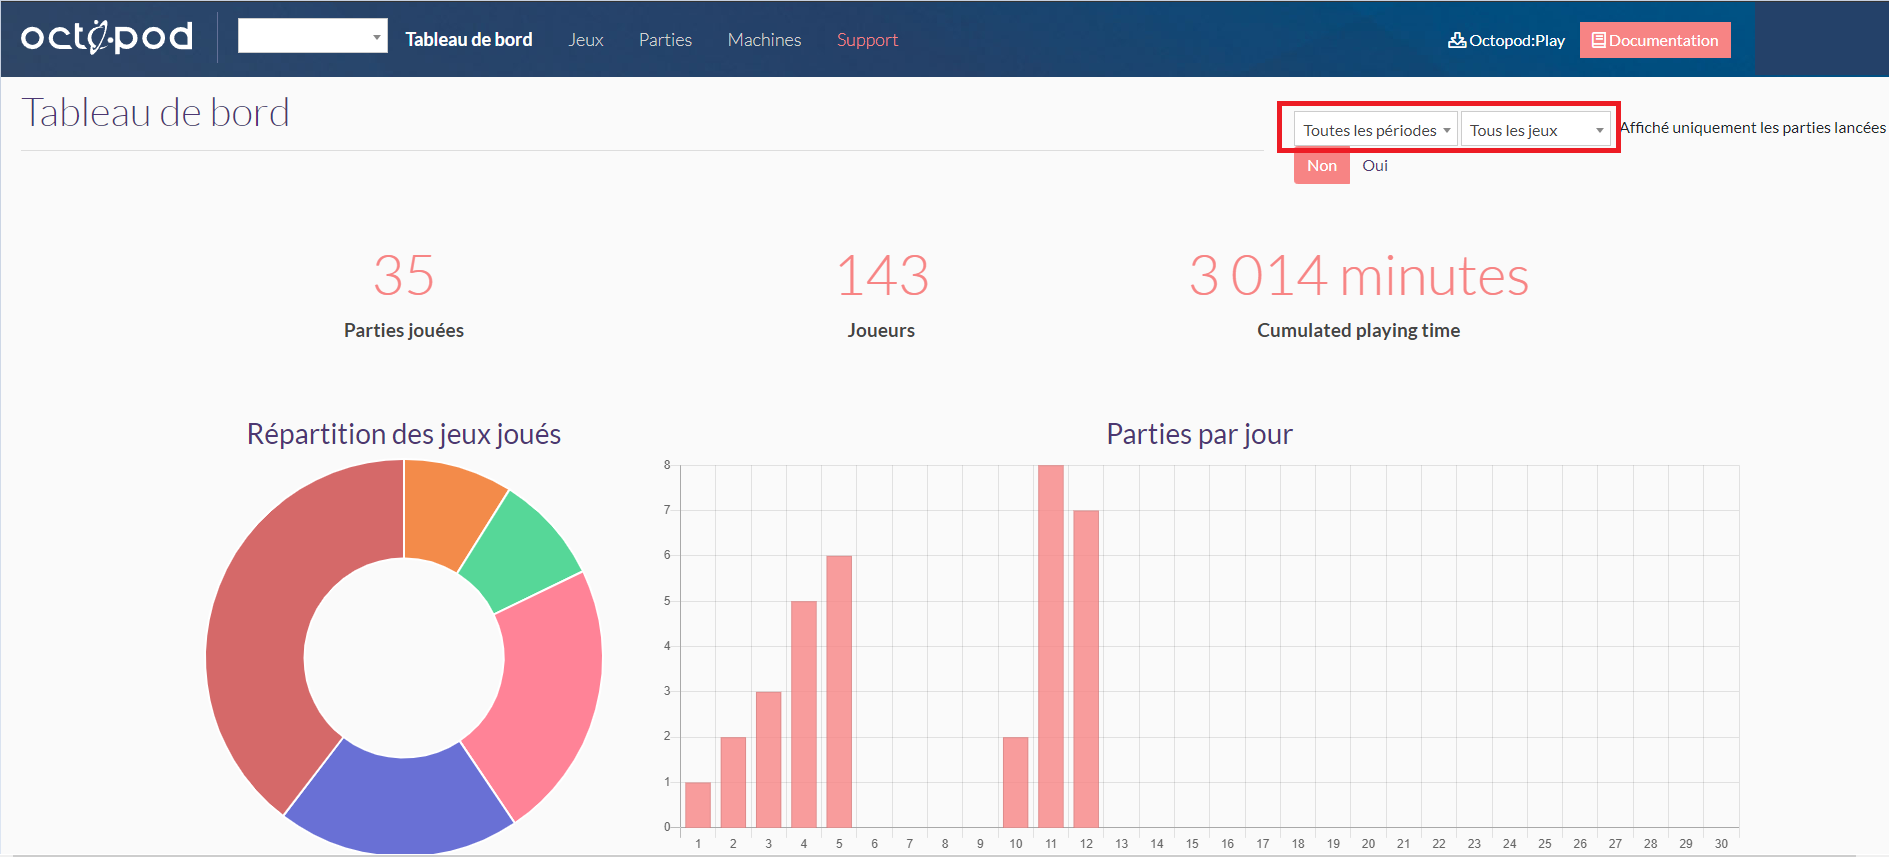
You have the possibility to browse month by month to check your consumption, as well as by game.
You can also access the summaries, line by line, of the games played, by clicking on the "Games" tab
Another important tab in Octopod:Insight is the Documentation tab at the top right.
You will arrive at this page:
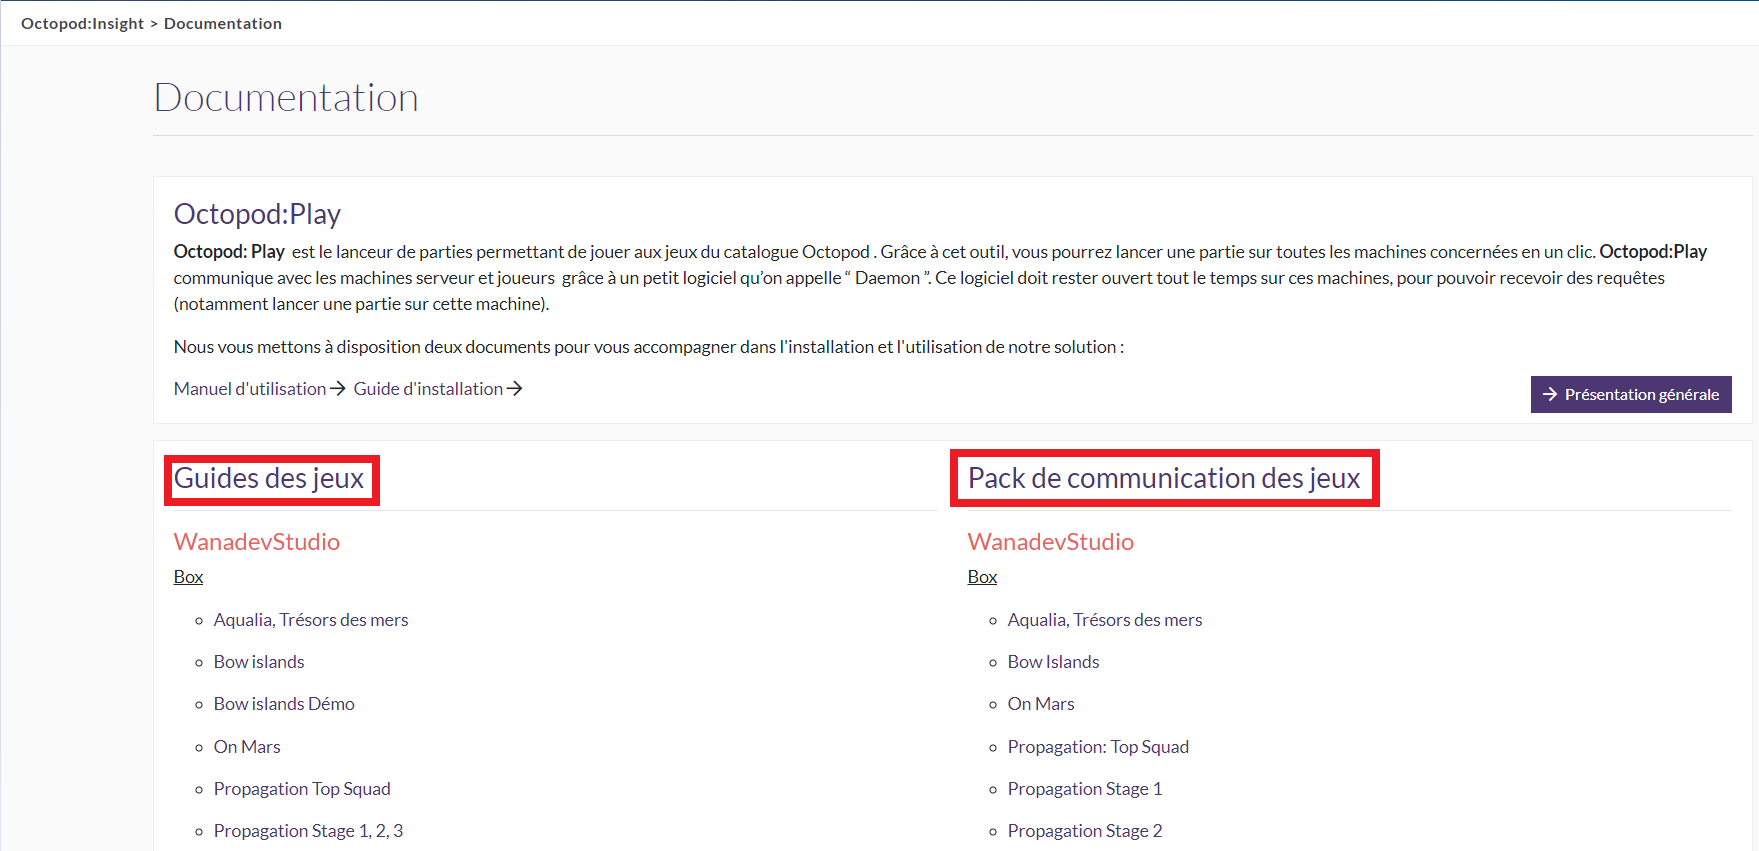
The category on the left contains all the guides for the games available in the Octopod:Games catalog. They contain all the necessary information for the good use of our games (How to launch a game, brief your customers, make them want to play, the target, etc.)
The right category contains all the communication packs of the games. Posters, images, videos, or trailers, you have a whole packaging at your disposal to communicate on your social networks, for example:
You can use these images as you wish to promote your events and your communication by adding the logo or mentioning the name of the studio in your publications.
You know everything! Do not hesitate to contact us for more information.
Related documents
For any problems, please consult our Common problems.
If despite everything, after having read correctly and having respected the prerequisites, you notice a blocking problem, you can contact support by following the following process: Octopod VR - How to report a bug.
For any assistance, you can contact our support by mail at support@octopodvr.com.
Change the IP of my player PCs
If you notice that you do not see any of your active computers in the configuration tab, or when trying to select them in the games, you may have changed your IP address. If it is the case, it is necessary to modify the file config.json that you will find in the following path: (C:\VRDesk\etc\daemon)
Enter the new IP address of the launcher on all machines (Launcher, Server, and Player PC).
Example of content from config.json:
{
   "server": "10.0.69.68:3000"
}
Do not change the port (:3000), only the IP address (here: 10.0.69.68).
The new IP address is shown in the Octopod:Play Configuration tab, in the Network Interface field."
Once the changes are completed, you can restart Octopod:Play.
Change Launcher's network interface
The Octopod:Play's launcher uses the Ethernet network interface by default since we recommend it for performance concerns.
However, you can change this default network interface by following this process:
- Stop launcher execution. You can do that by clicking in task bar on launcher icon ;
Open Windows PowerShell ;
Drag and drop the
service.exefile located atC:/Octopod/bin/launcherinto the PowerShell window ;
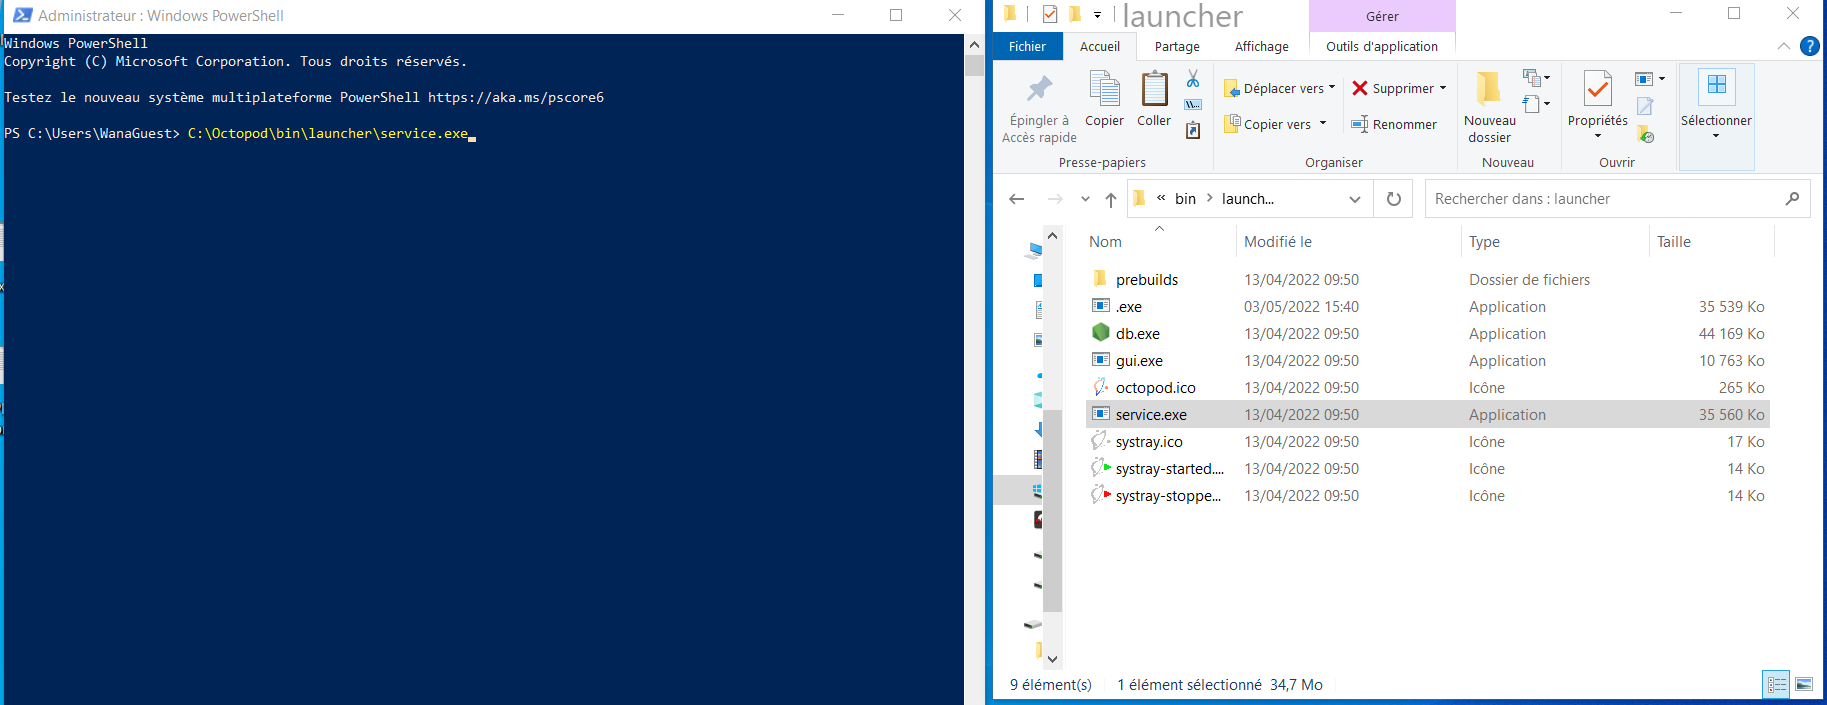
- Add
configas argument of the command line ;
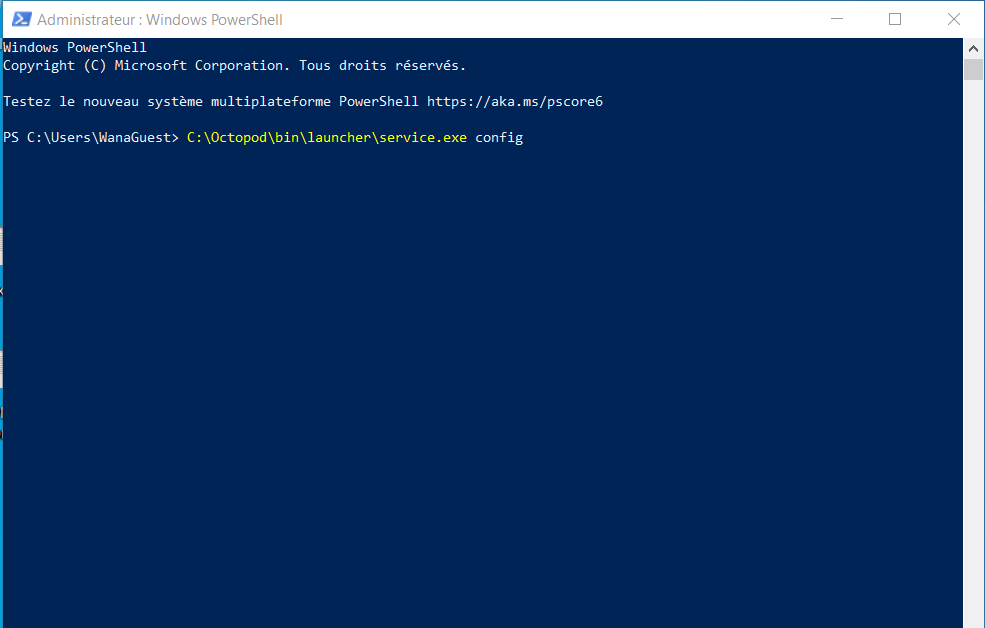
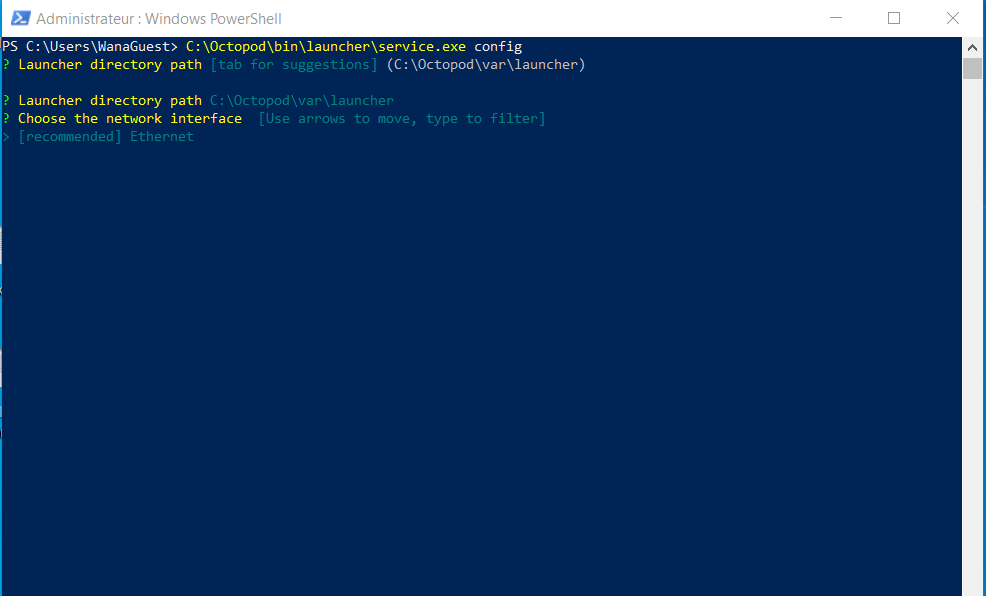
Execute the command line by pressing the Enter key ;
Select the games' path directory (hint: use auto-completion with the tab and arrow keys) ;
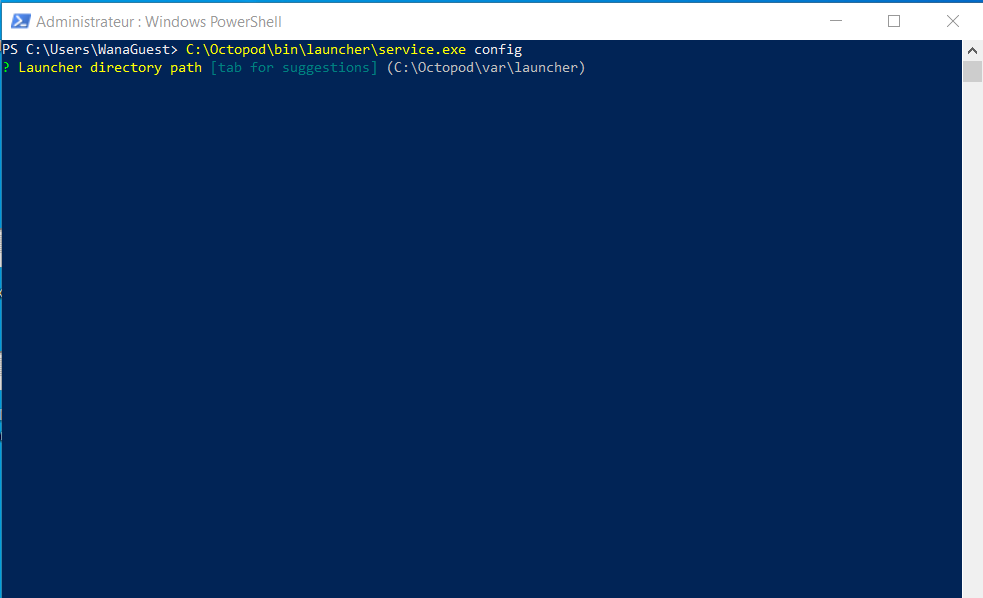
Confirm the games' path directory by pressing the Enter key ;
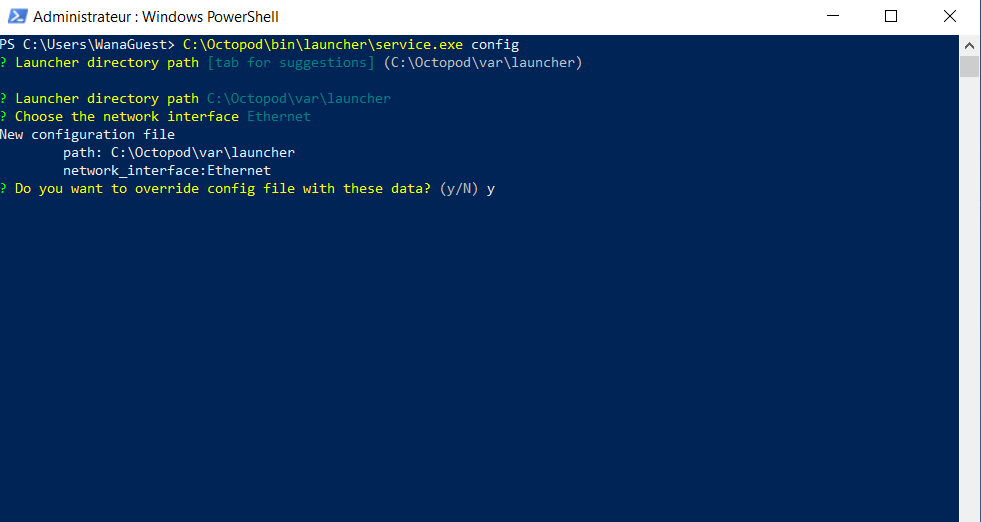
Select the network interface you want to use (use arrow keys and press Enter to select) ;
- Confirm the new configuration by typing the Y key (for yes) or cancel by pressing N (for No) ;
- Restart launcher by clicking in task bar on launcher icon.
Move data to another disk
Octopod storage can be fat on disk according to total games installed mainly. For this reason, it's necessary to move data in another location like another disk. Default path is on disk C:\. Sections below explains you how to move launcher and daemon data to another place.
Move launcher data
- Stop launcher execution. You can do that by clicking in task bar on launcher icon ;
- Open Notepad application and open file at
C:\Octopod\etc\launcher\config.json;
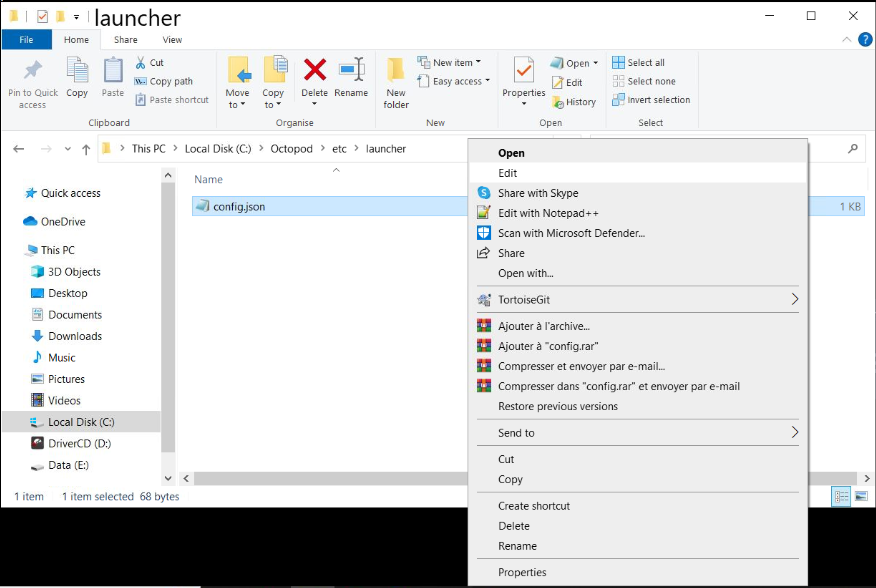
- Identify storage location into
config.jsonjust opened ;
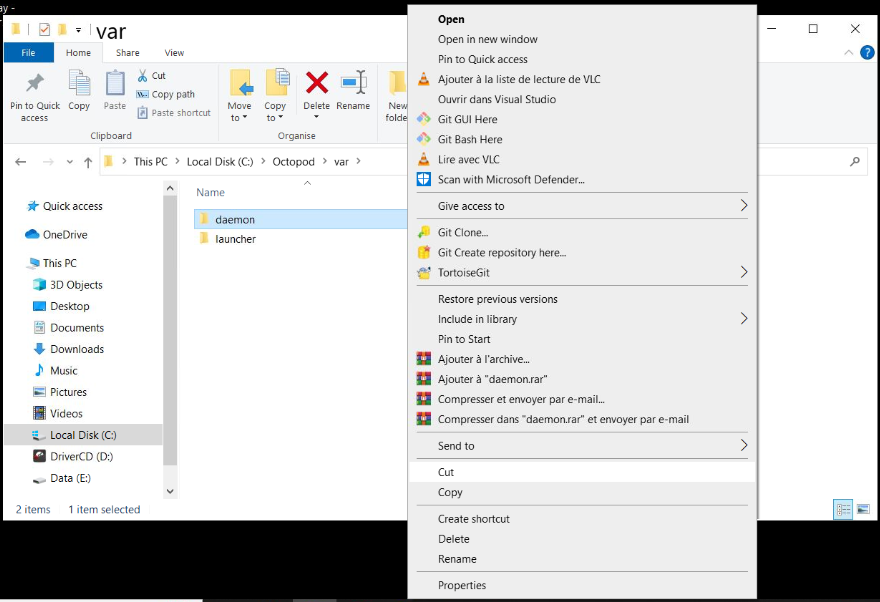
- Open your explorer and go to location. Then, move your folder to new location (cut/paste) ;
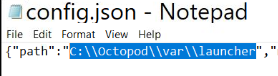
- After moved, enter in folder and copy path (you can see location in top window) ;
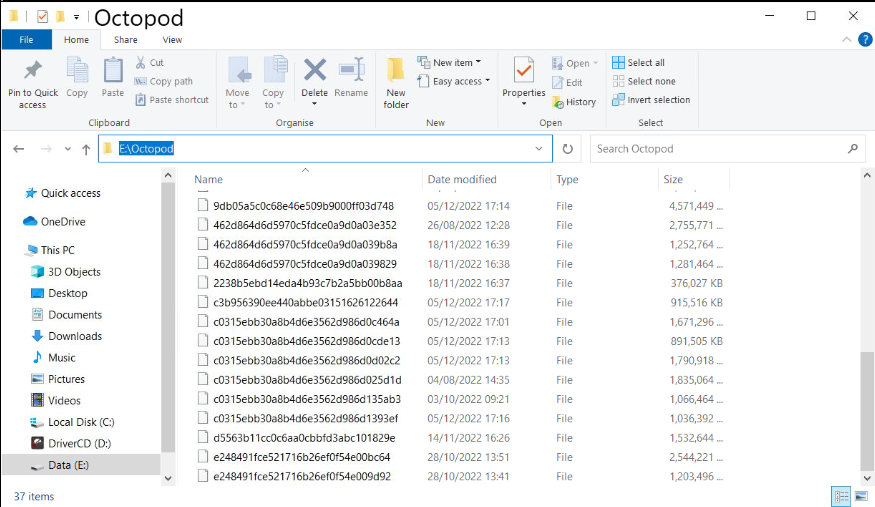
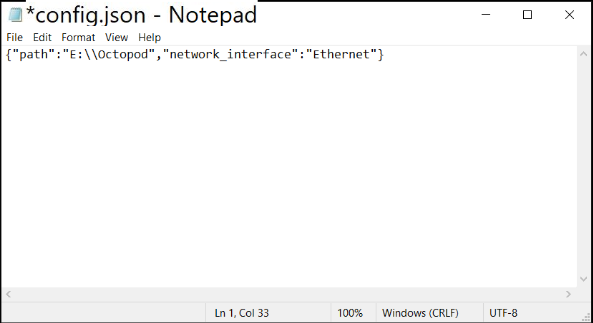
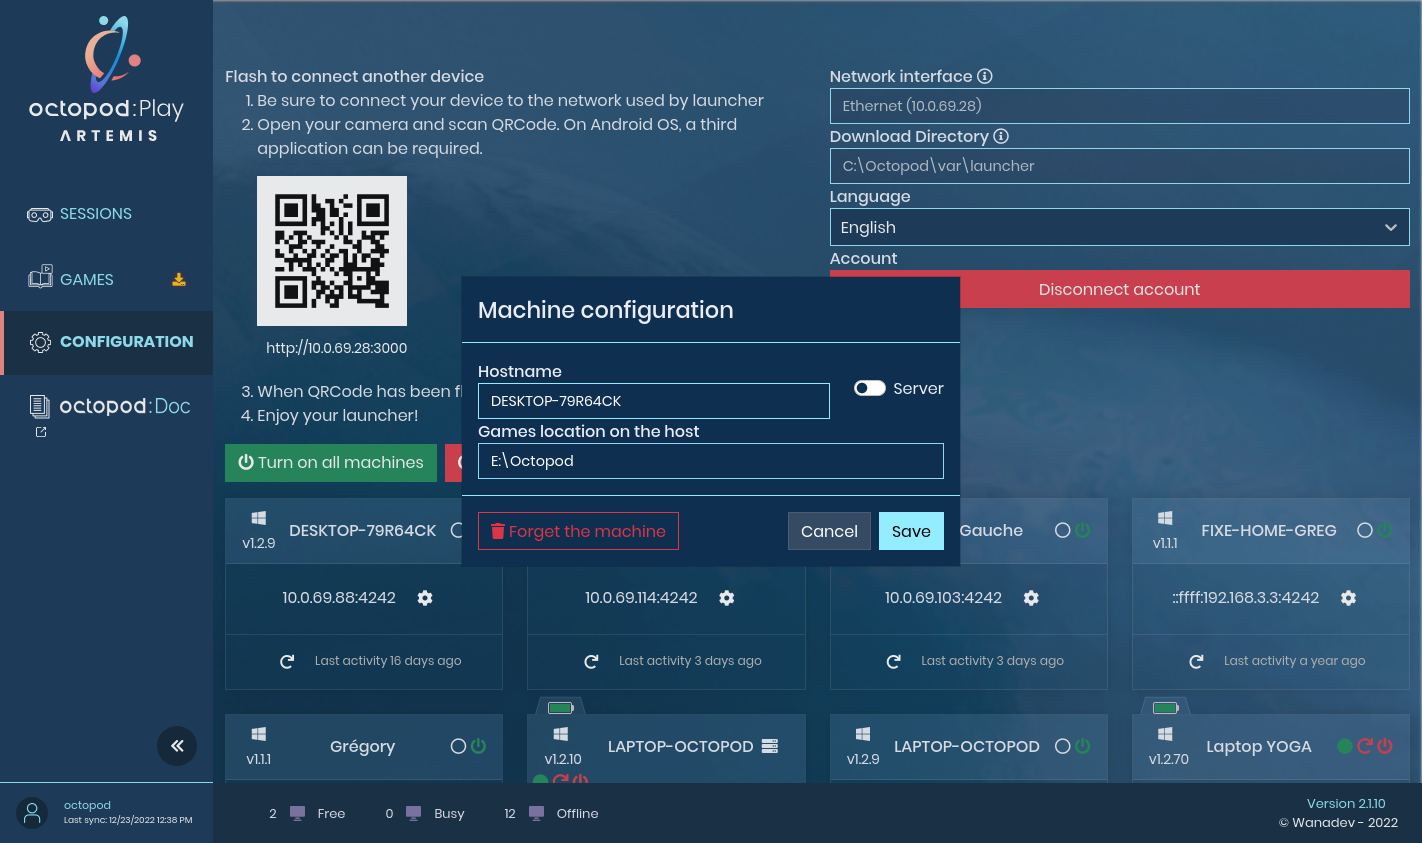
In Notepad update
config.jsonby editing path displayed by new location. Caution,\char should be "escaped" with one more\. Then, save the file.For example, if your path is
E:\Octopod, the path to write isE:\\Octopod.
- Close Notepad and Explorer windows and start launcher.
Move daemon data
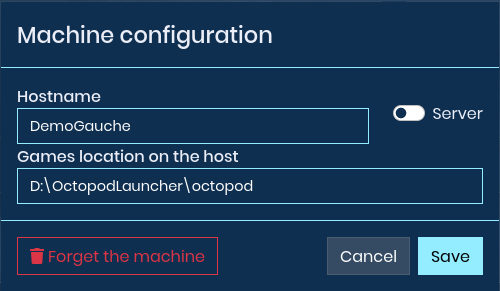
- Open launcher interface and go to Configuration tab ;
- Identify machine that you want re-configure and edit these properties by clicking on cog icon ;
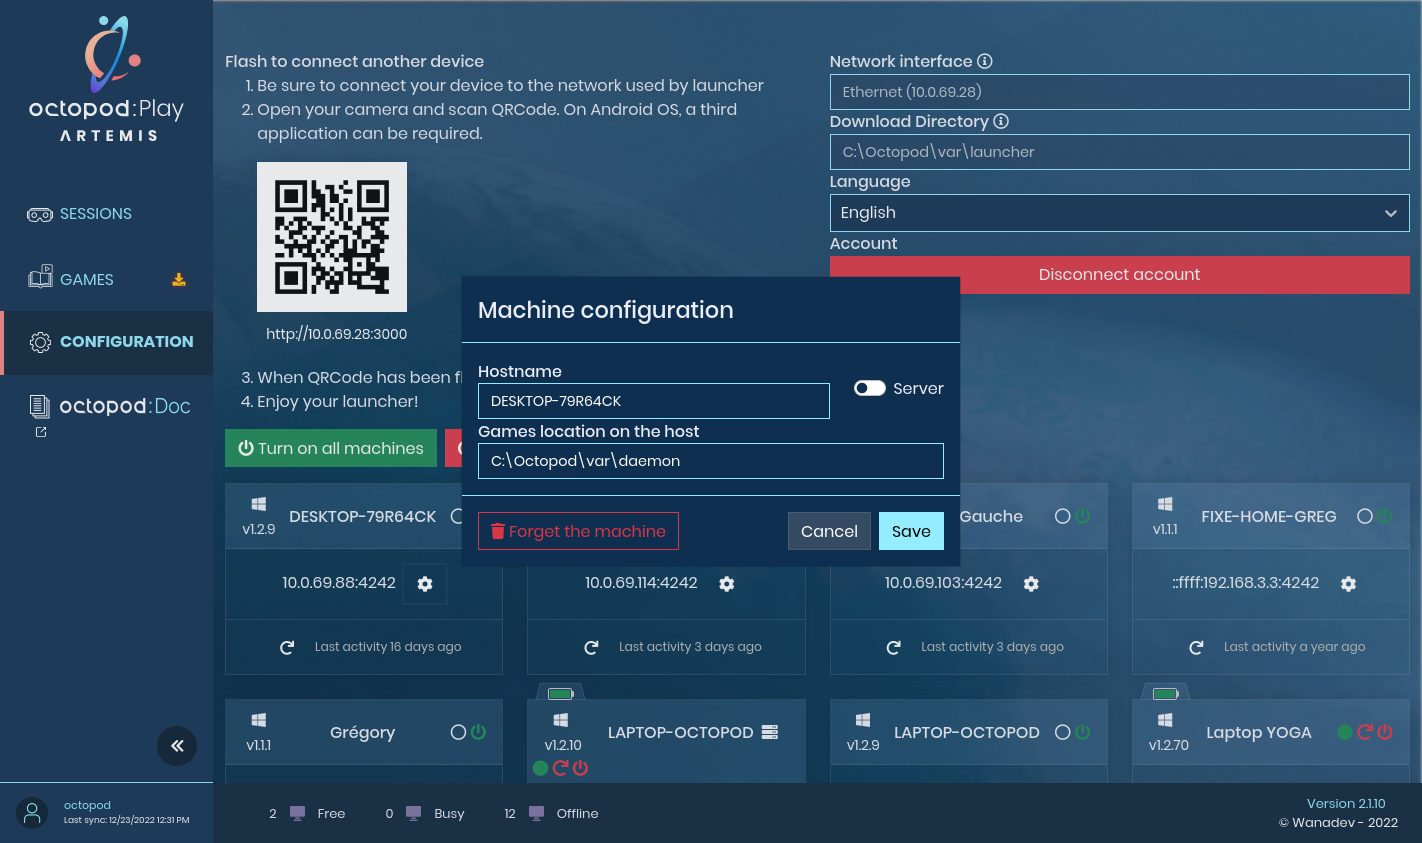
- Go to machine where you want move data. Open explorer and move folder at path written in machine settings to new location ;
- Go again on launcher interface and change path. Save and start daemon.
Uninstall Octopod:Play
Game master (a.k.a. launcher)
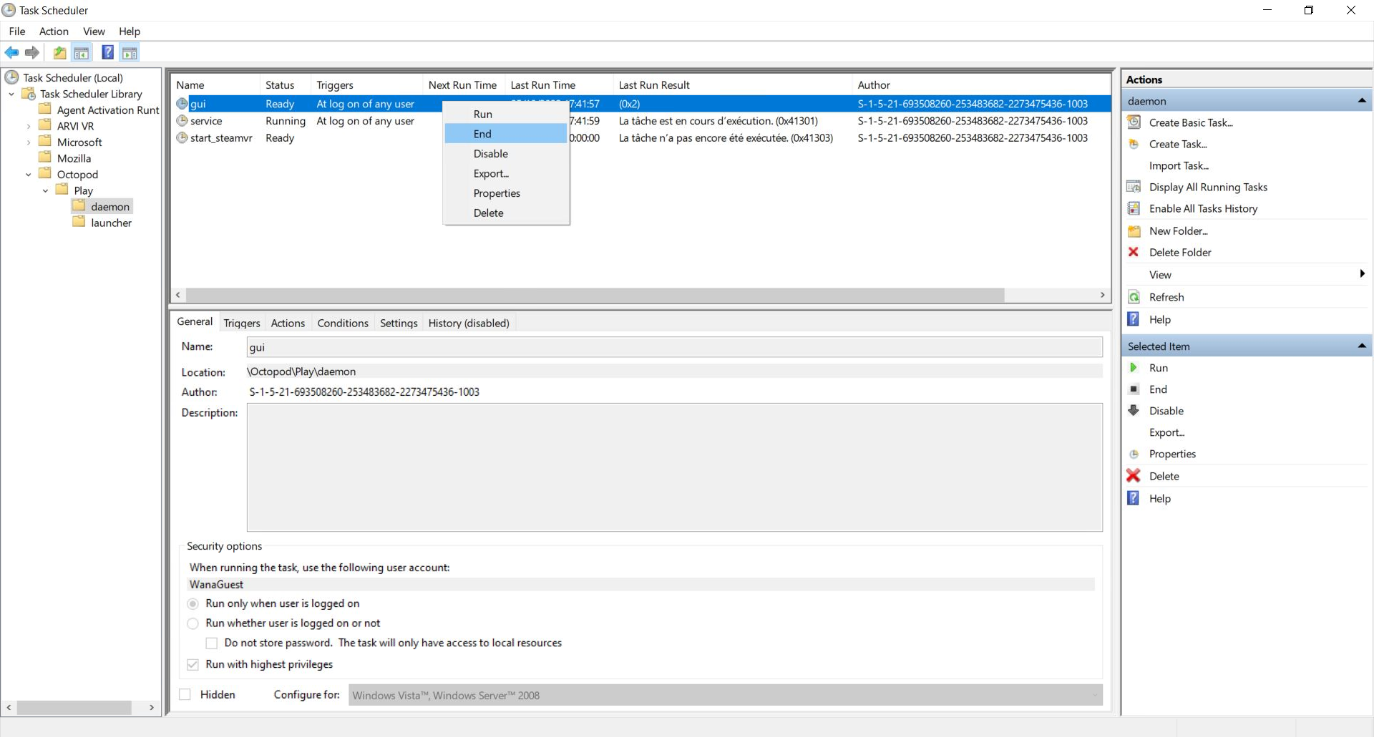
- Open "Start menu" (press Windows logo key in bottom-left of your screen), search "Task Scheduler" program and open it ;
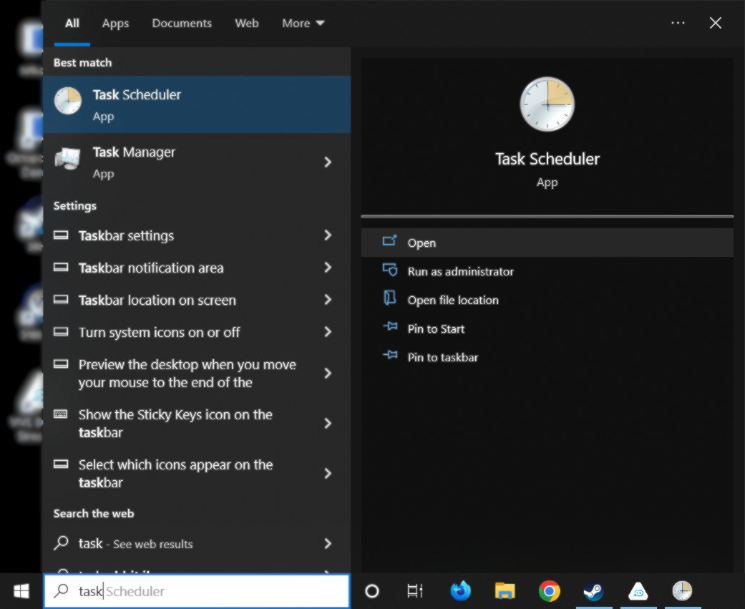
- In "Task scheduler" you can see sidebar in the left of the window. Open tree (Library > Octopod > Play).
Select sub-folder "daemon". Then into center of window, you can see list of tasks. For each task you can see (gui, service, etc.), do a "click-right" and press on "End" action. Then you make a new "click-right" on same task and press "Delete" action ,
- Open your "File Explorer" and move on disk C:\ ;
- If you have moved your "launcher data" in specific path (you can open configuration file at C:\Octopod\etc\launcher\config.json and read key
path). You can remove custom folder and jump to step 5 ; - Drop folder Octopod (full path is C:\Octopod).
Player machine (a.k.a. daemon)
Open "Task Scheduler" app. See Game master (a.k.a. launcher) section step 1 ;
Follow step 2 described in Game master (a.k.a. launcher) but do actions in "launcher" folder ;
Open your "File Explorer" and move on disk C:\ ;
Remove data folder. You can follow point a. and b. to find path:
a. To find data path, go on your "launcher" in "Configuration"
b. Edit machine concerned
Drop folder C:\VRDesk.