How to use
Introduction
After successfully installing Octopod:Play, you may wonder how to use it efficiently. Generally speaking, the launcher is very easy to use, but there are a lot of options that you have probably never heard of.
This user's manual will go into detail in every nook and cranny of the launcher, to explain its many features and options, all developed with one goal in mind: to simplify the operation of your VR center.
The Octopod launcher
Switching Octopod:Play on and off correctly
After downloading and installing Octopod:Play and its Daemon, you will have 2 icons available in your Windows "systray" (often at the bottom right of your taskbar):
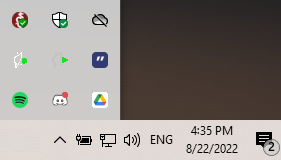
The logo on the left with an arrow corresponds to the launcher and the one with a circle to the Daemon. Their green states indicate that they are on. If they are red, they are off.
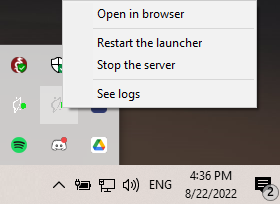
Closing the browser or the launcher does not affect the launcher. If you want to turn it off and on again for any reason, you will need to right-click on the icon in your systray, then either shut down the server and turn it on again, or restart it.
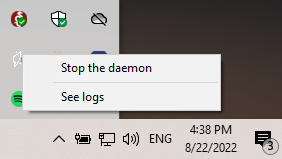
Same thing for your daemon:
Sessions tab
Sessions history
In the game tab, once you have played a few games, you will have access to the game history:
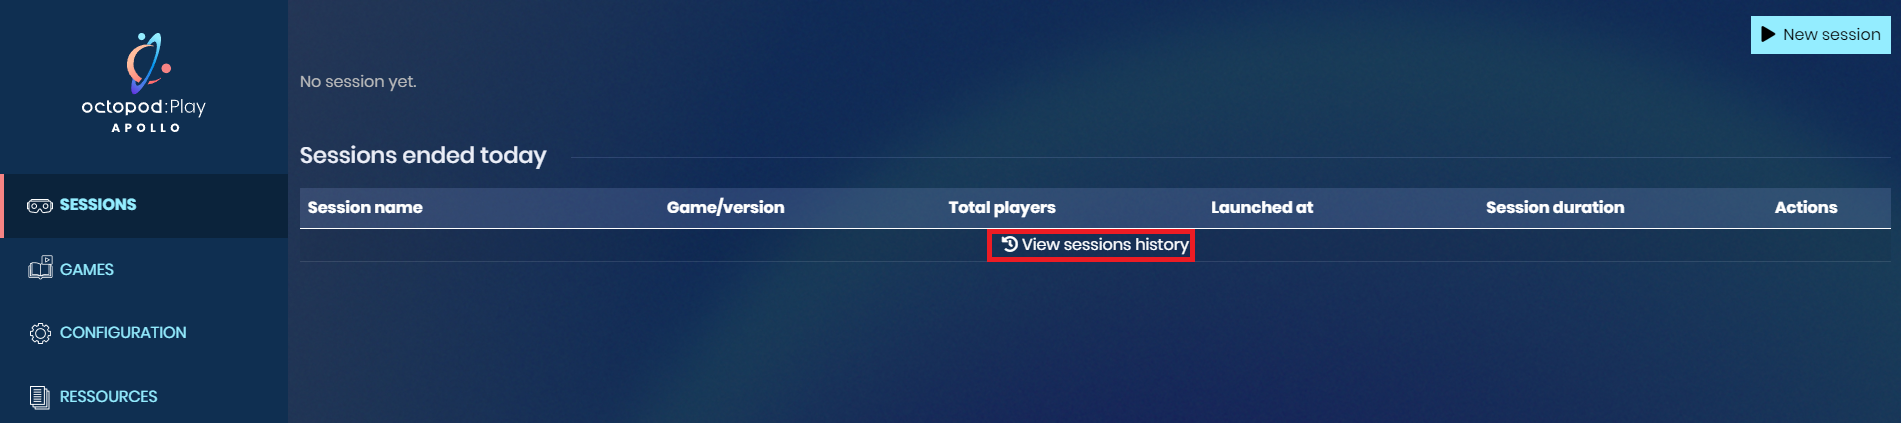
You will then have access to the list of created and finished games:
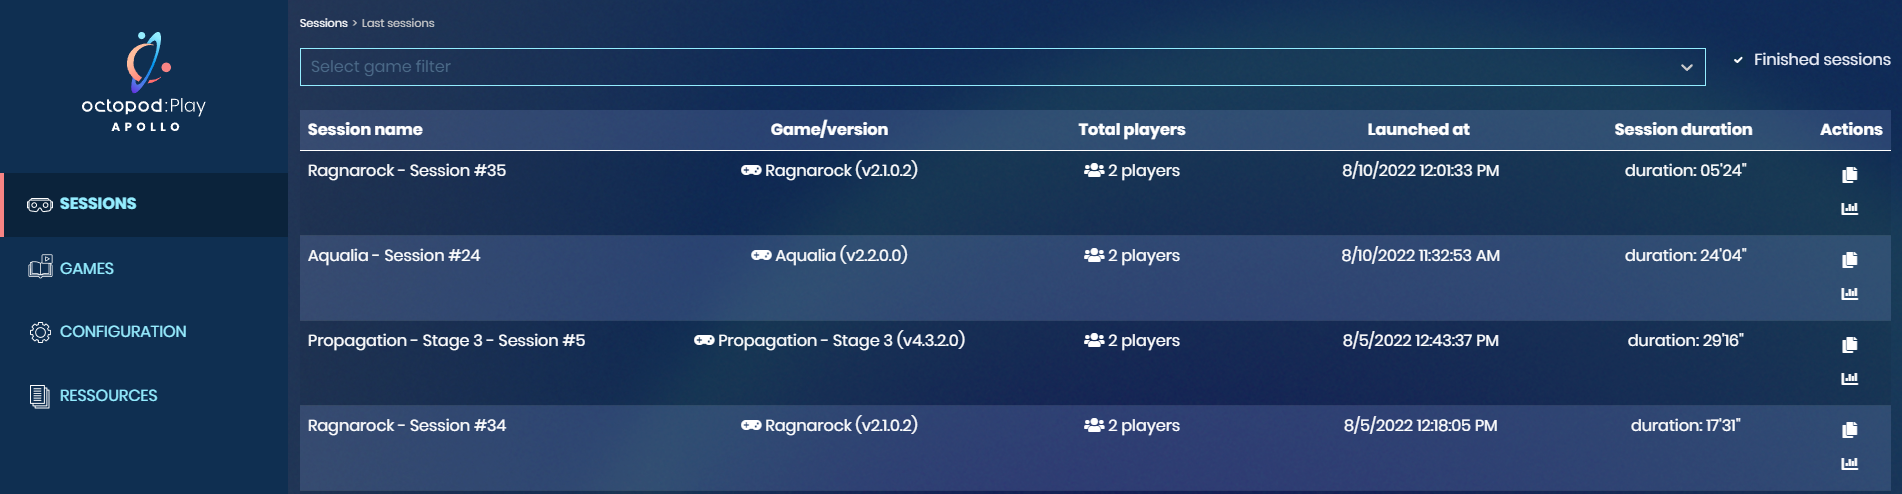
Here you have several interesting options:
 If you want to duplicate the game (e.g. customers want to play the same game/playlist ...).
 If you want to display the scores of this game.
 Clicking on the session will take you to the game, where you can perform several actions (View scores, duplicate the game, check players' names).
 If you want to generate logs.
For the generation of the logs, it is necessary that all the machines having taken part in the game are switched on and go up in the launcher (daemon switched on and correctly configured)
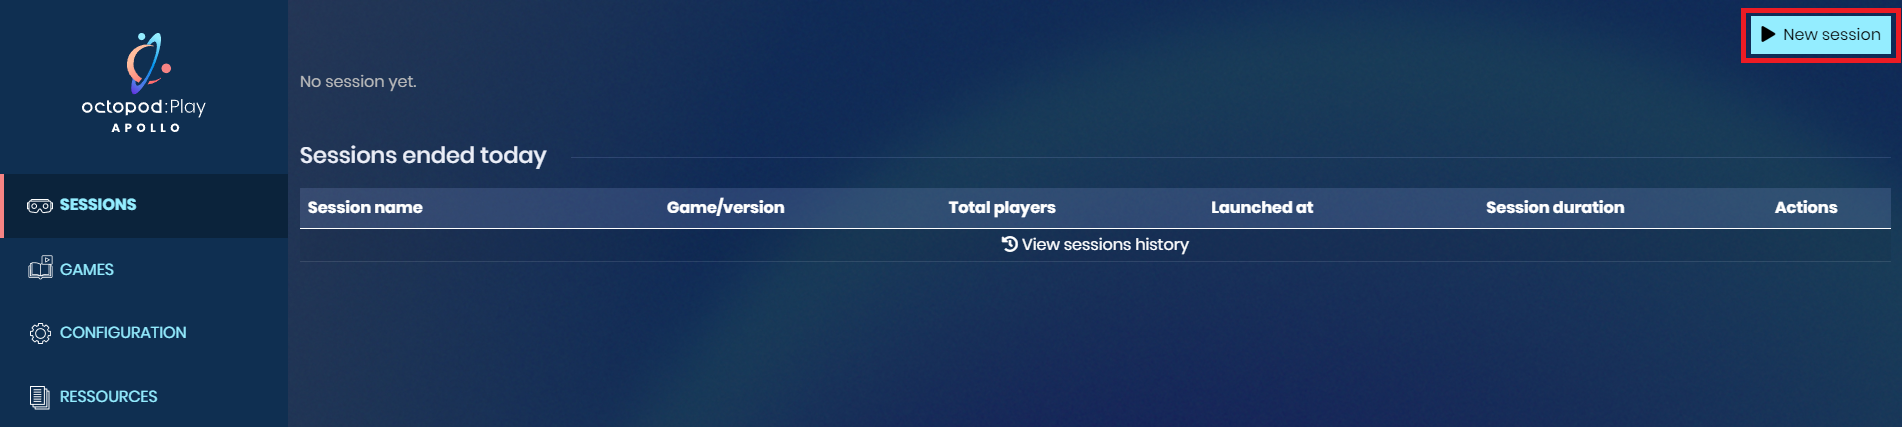
Set up the game
To start a game, go to the screen accessible from the "New Game" button on the top right, then click on the desired game.
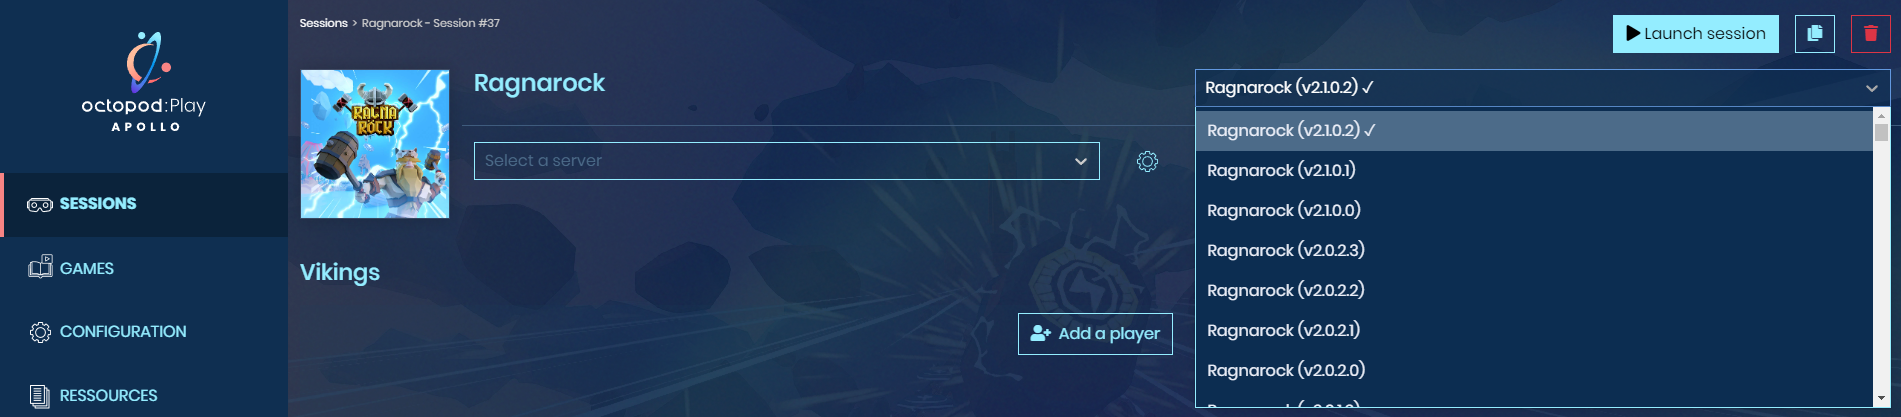
You will land on a game configuration screen (here Ragnarock):
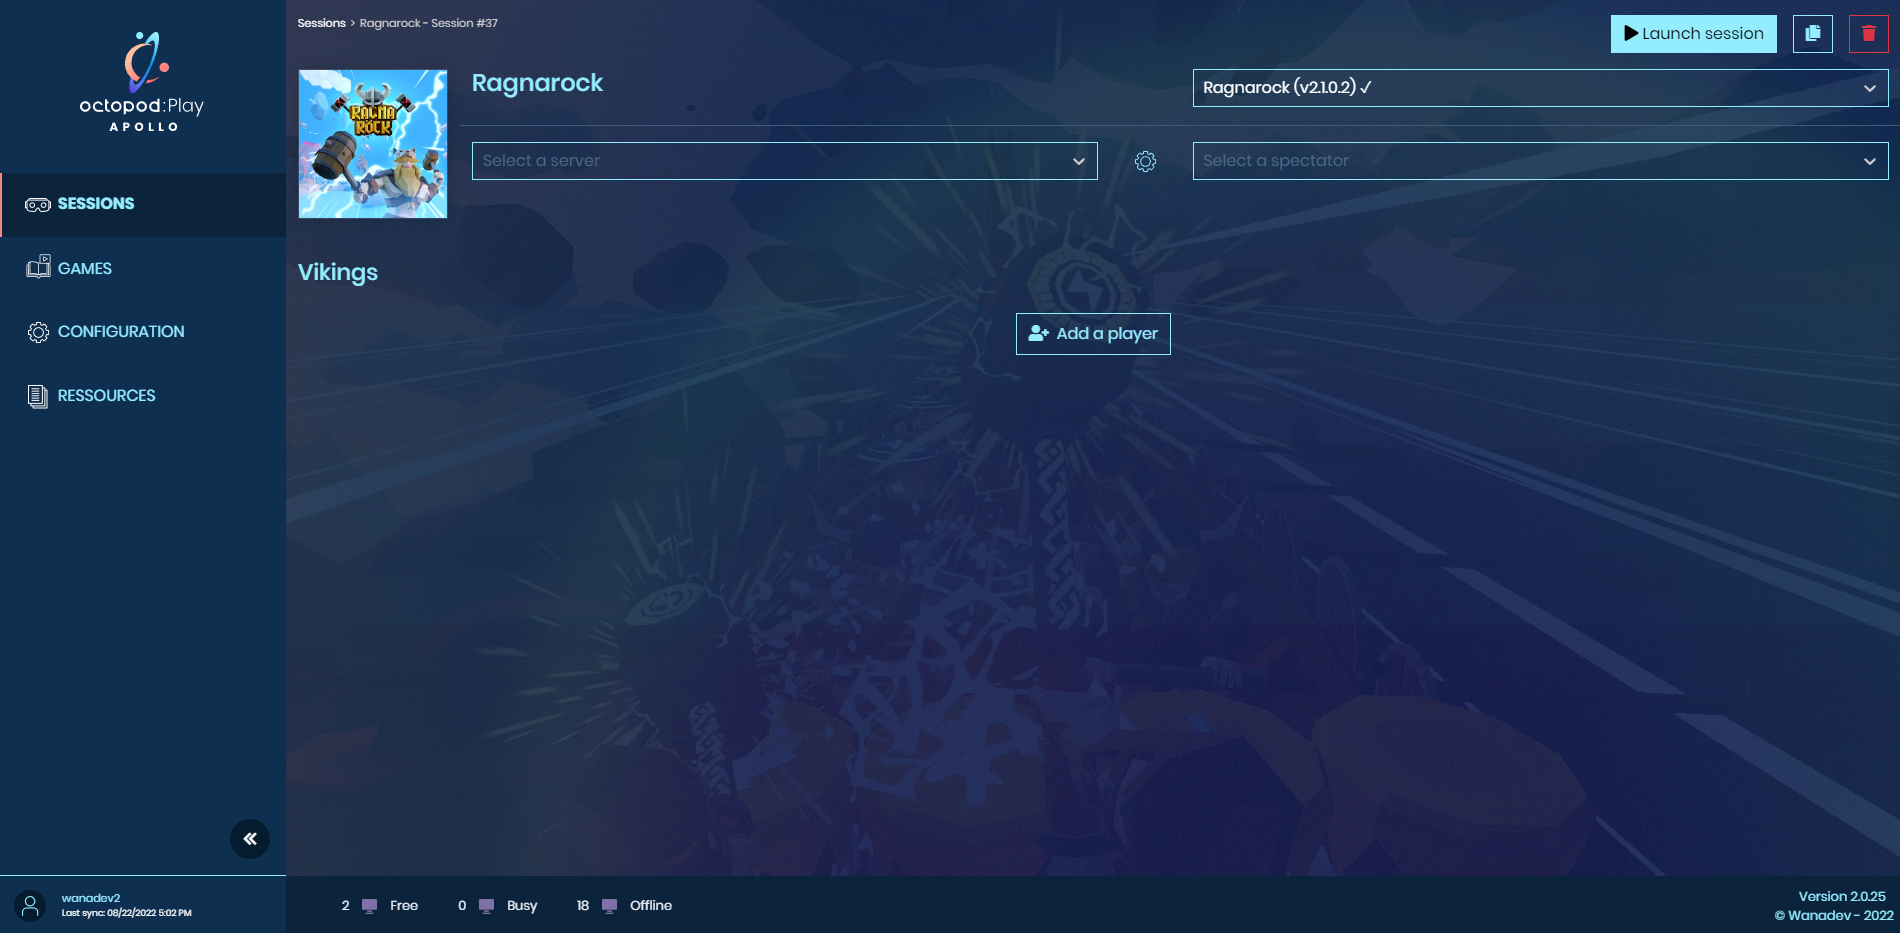
There are several options available to you:
- By clicking on the name of the game, you will have access to the versions you have downloaded. If you have more than one, this allows you to go back to an older version, if the most recent one causes you a problem (for example, following an update).
- Select a server, to assign a machine to this function. By clicking on the drop-down menu, you will have priority access to the computers defined as servers (see section "Configuration")
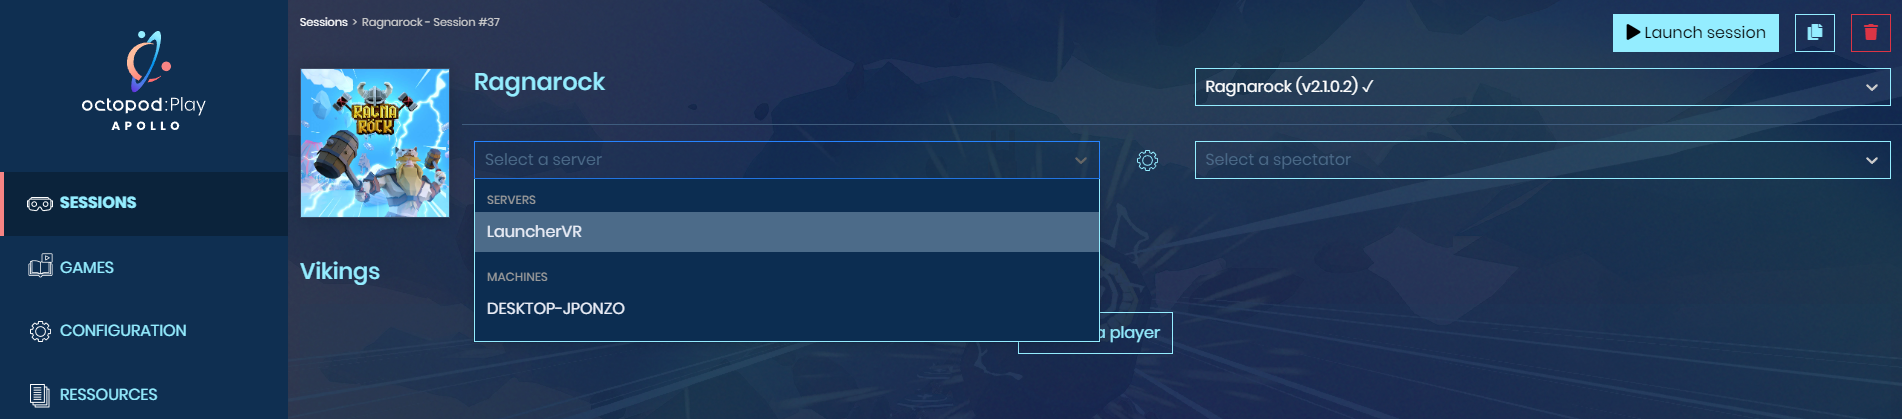
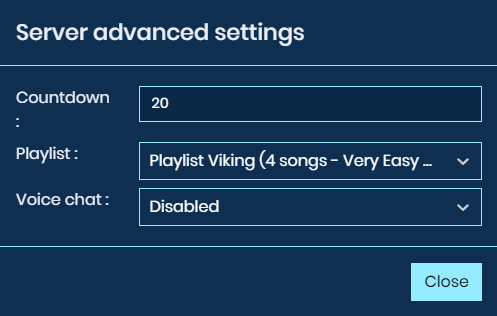
Once you have selected the server, you will have access to the server options. Generally, these options concern the game options (game time, version, general voice chat, playlist...)
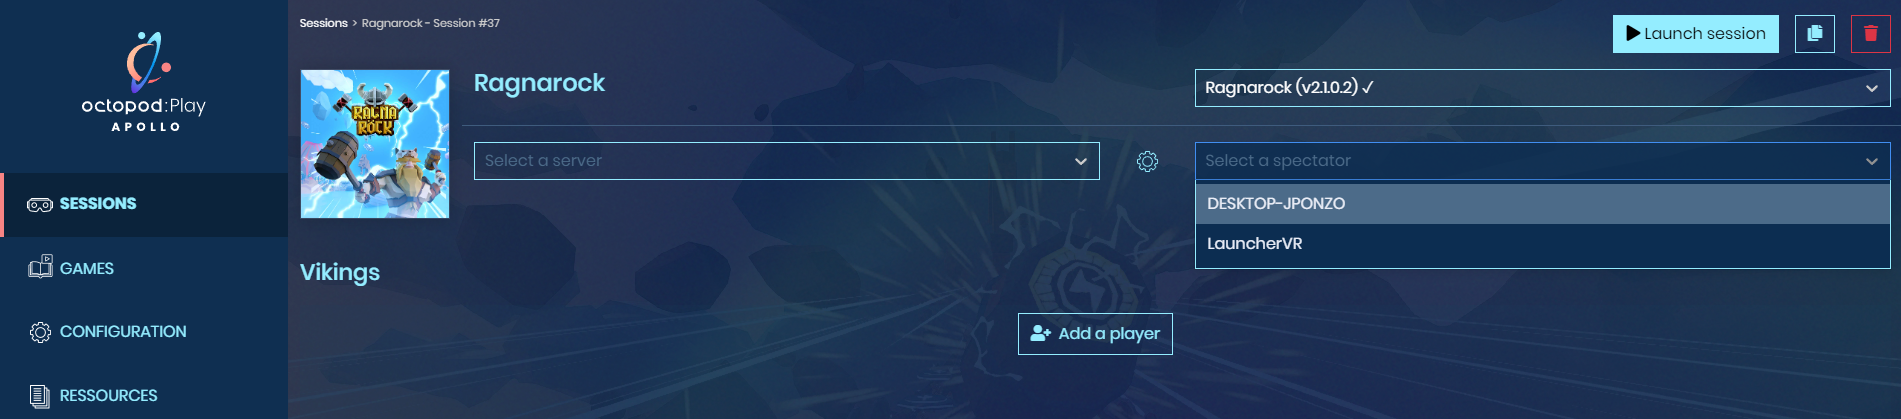
- Just to the right of the cogwheel is the tab for the spectator. The spectator is optional in all WanadevStudio games but may be mandatory for the launch of some games (see the corresponding game guide.) The spectator allows you to generate a camera, which, depending on the game, is free or moves according to the actions of the game.
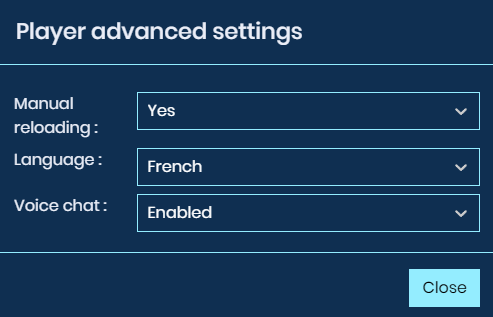
- Add a player, and add as many as you want. Each time you add a player, a line appears, with several options available: 1) Change the nickname, directly by clicking on Player 1 2) assign a Player PC to this player 3) player options on the cogwheel (These settings are unique to the player and must be changed for each player wanting a different option).
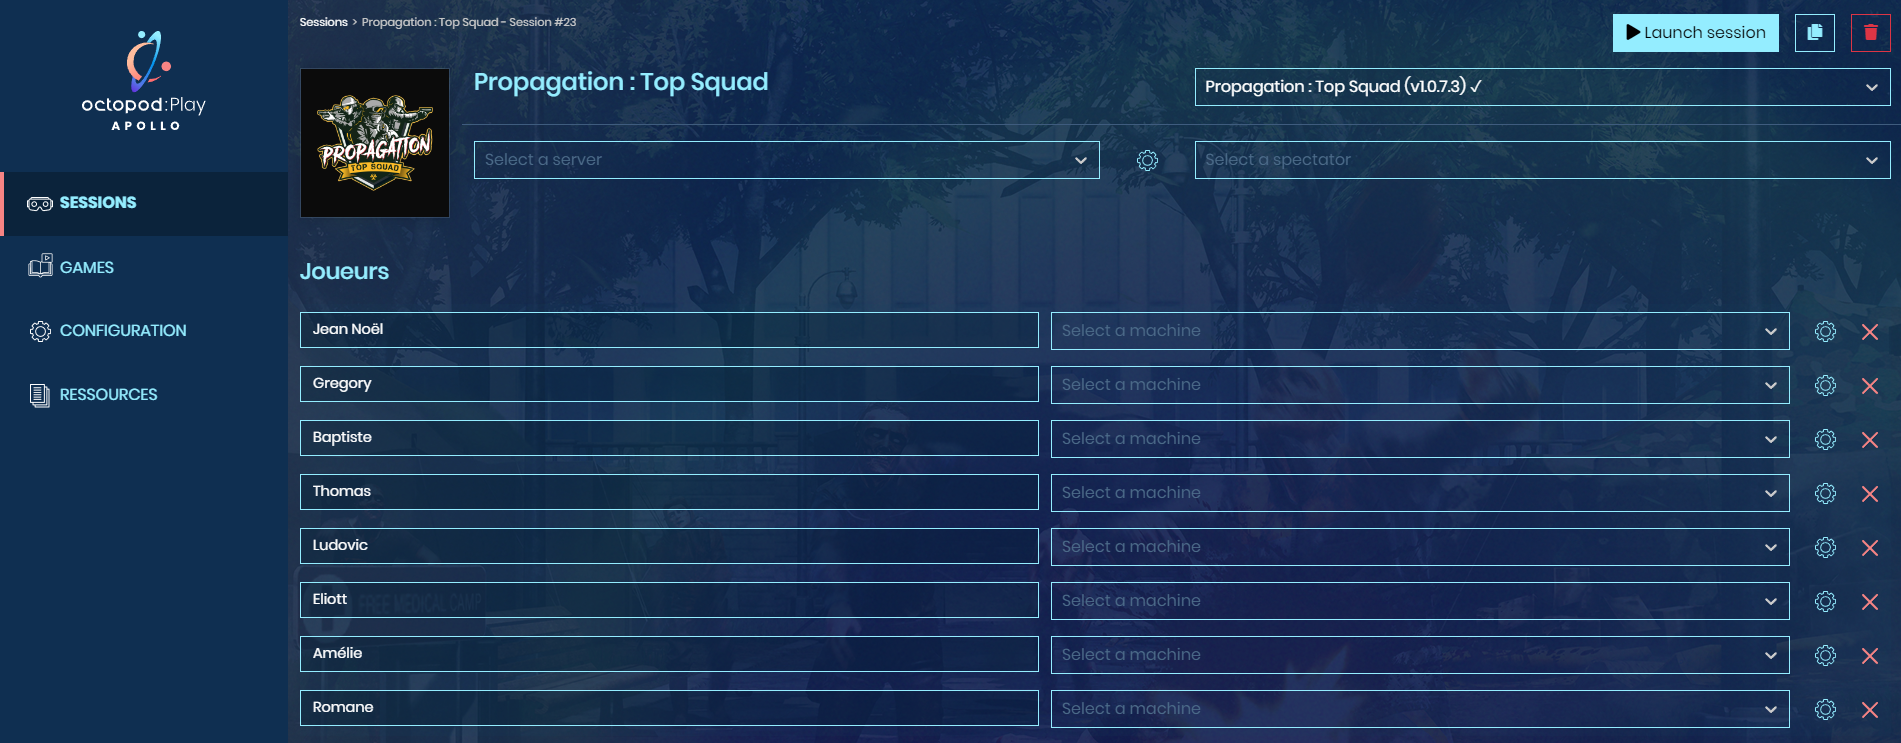
- The player options differ depending on the game but allow for adaptability to all players. Do you have groups with English/French speakers? No problem, everyone can play in the language they want!
Launch the game
After setting up the game as you wish, you have two options:
- If you want to start the game instantly, you can directly click on start game, which will start the server, the spectator if there is one, and all the players present.

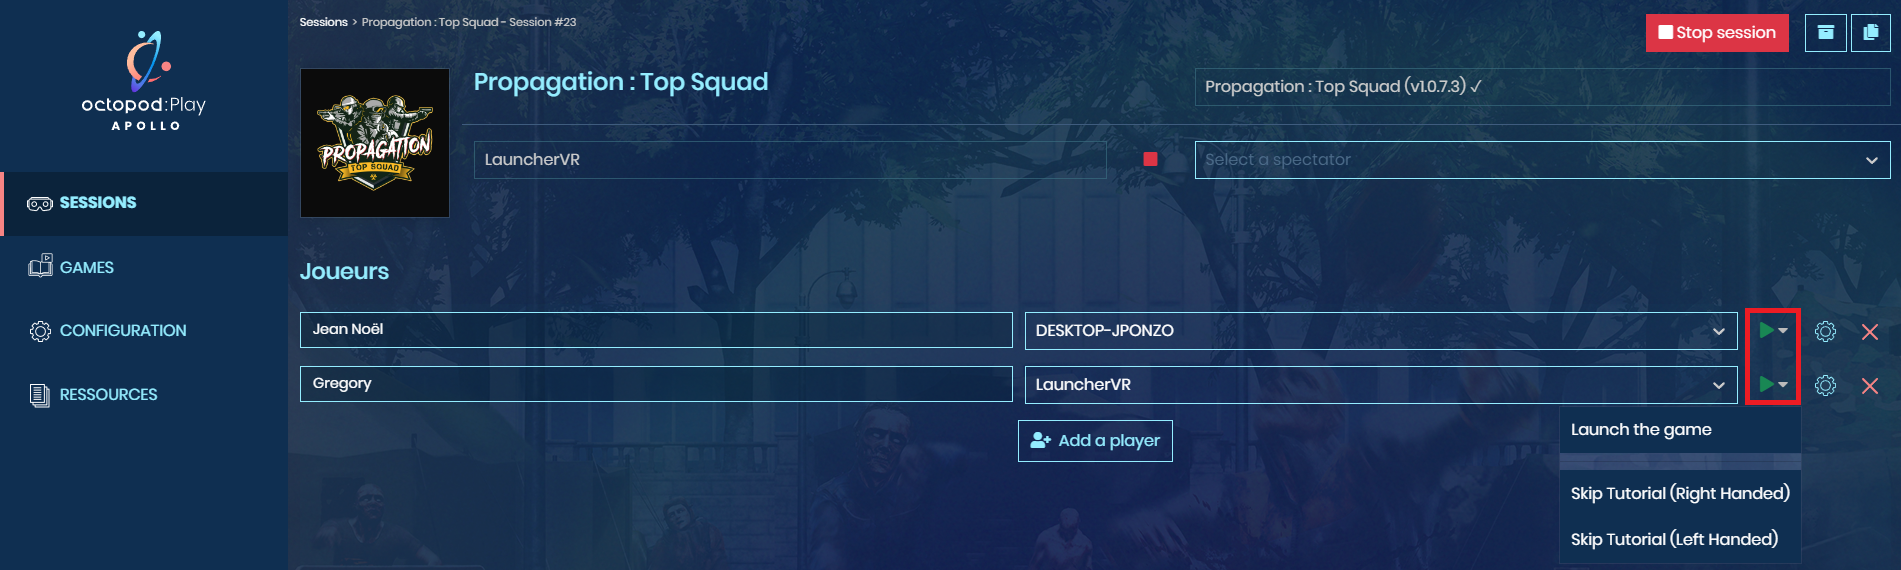
- If you want to launch the players one by one, or skip the tutorial, you will have to launch the server first with the green arrow (which appears after selecting your server)
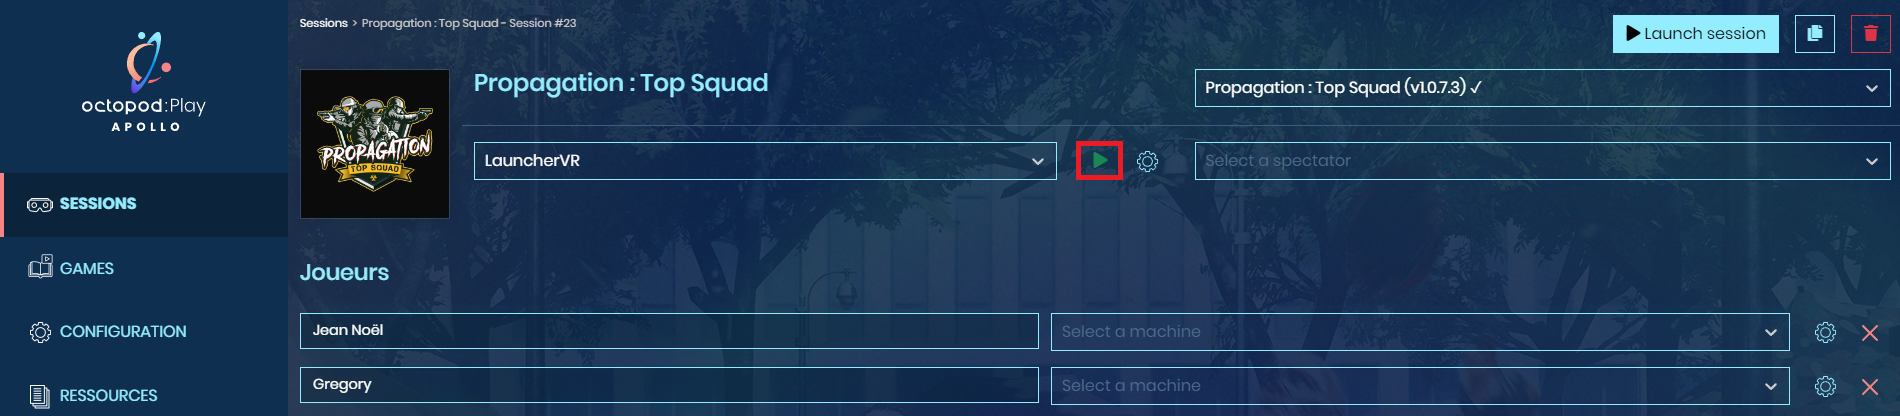
then click on the little green arrow next to each player and select the option "start the game" or "skip the tutorial" if you do not want to have a tutorial.
The role of the Server PC
Server PC is the master of all the parts. That is why it must have enough computing energy to quickly process all the data transmitted (see Octopod technical specifications).
It is recommended to have a server machine every 10-12 player PCs.
The role of the Launcher PC
Launcher PC, also called PC Game-Master, is your machine, generally located in your reception. It has the Octopod:Play launcher installed, and thus allows you to use the Octopod ecosystem from it.
Since the Apollo version of Octopod:Play, you can also access the multipoint access to have direct access to the launcher from a tablet, or another computer on the same network as the PC Game Master (see multipoint access section).
The role of the spectator PC
The spectator has several roles depending on the game:
- It allows you to have a Game Master view and interact with the game in progress, or to move around in a free camera view;
- It is mandatory on some games to generate a launch window. (see game guide);
- It allows having a dynamic view of the game in progress, and can be retransmitted on another screen.
Games tab
Download and installation of the games
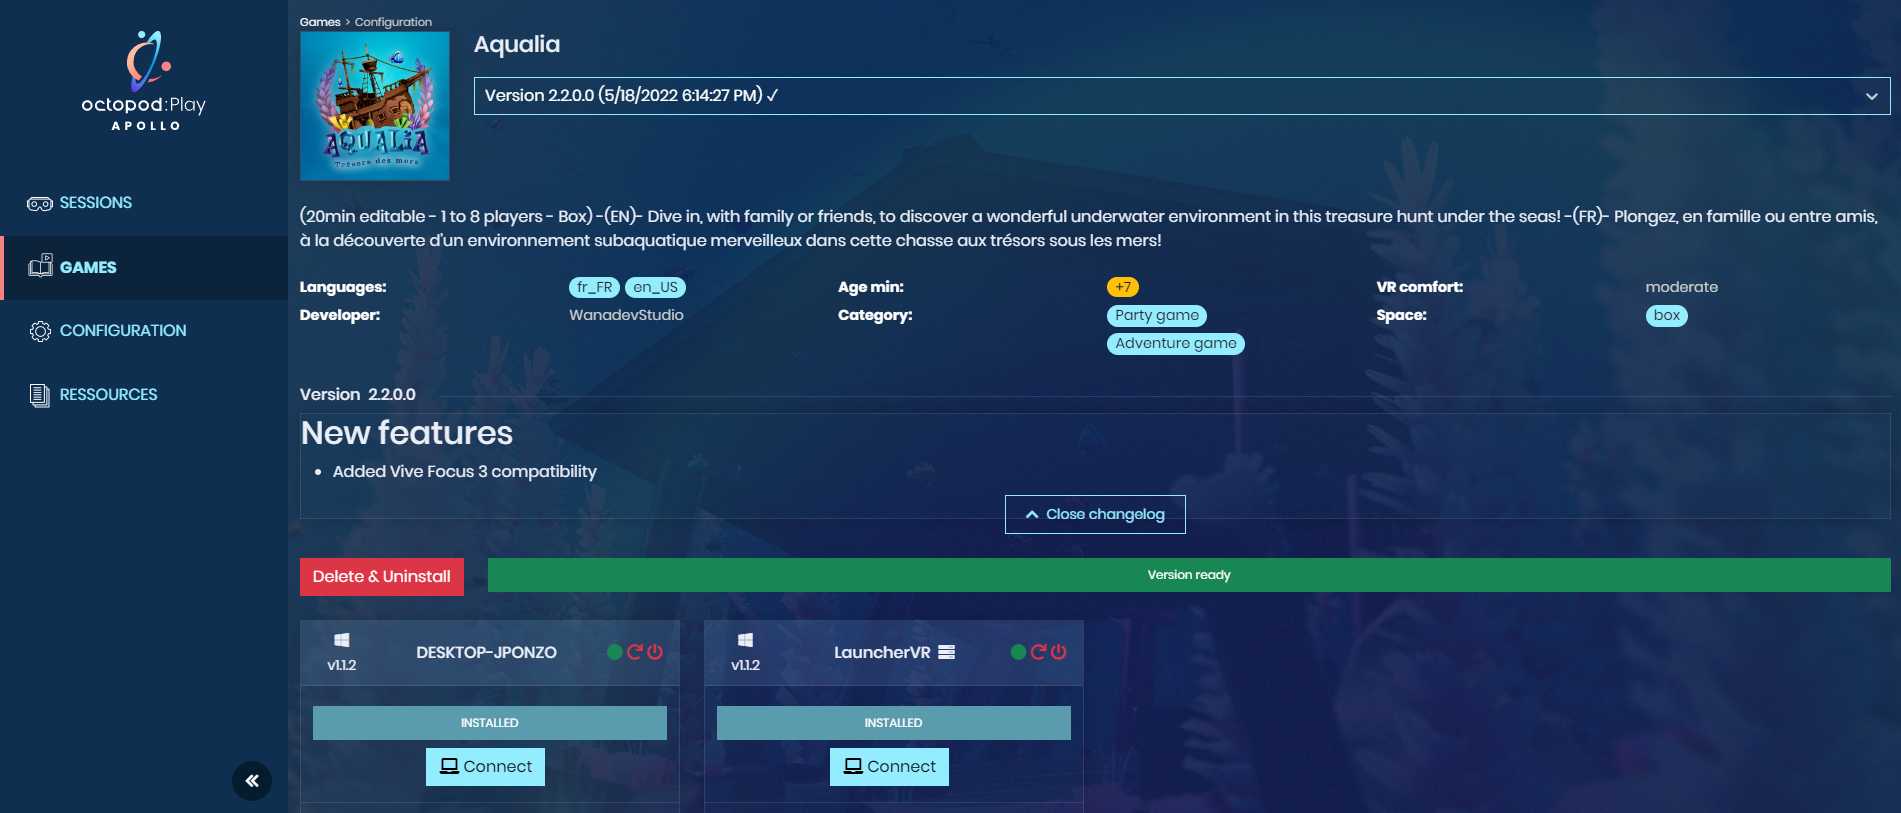
The "Games" tab represents the catalog at your disposal. It contains all the VR games you have access to. You are free to choose the ones you want to install.
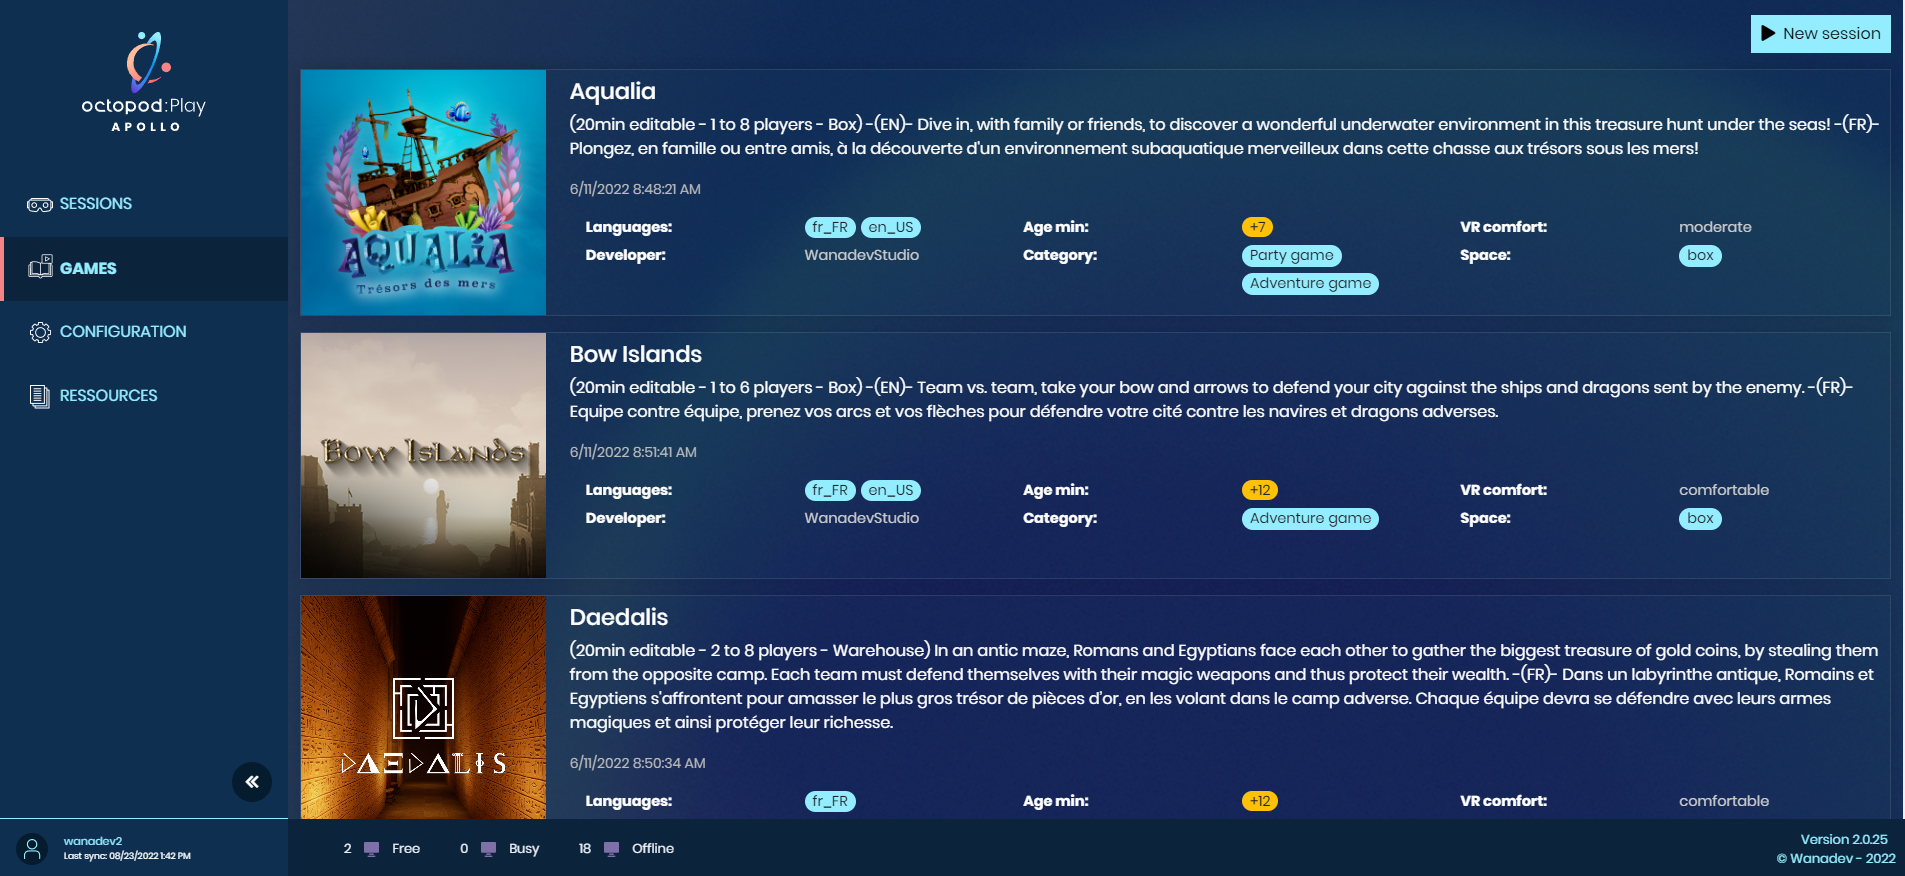
Select the game you want to install.
You will land on this screen with several options:
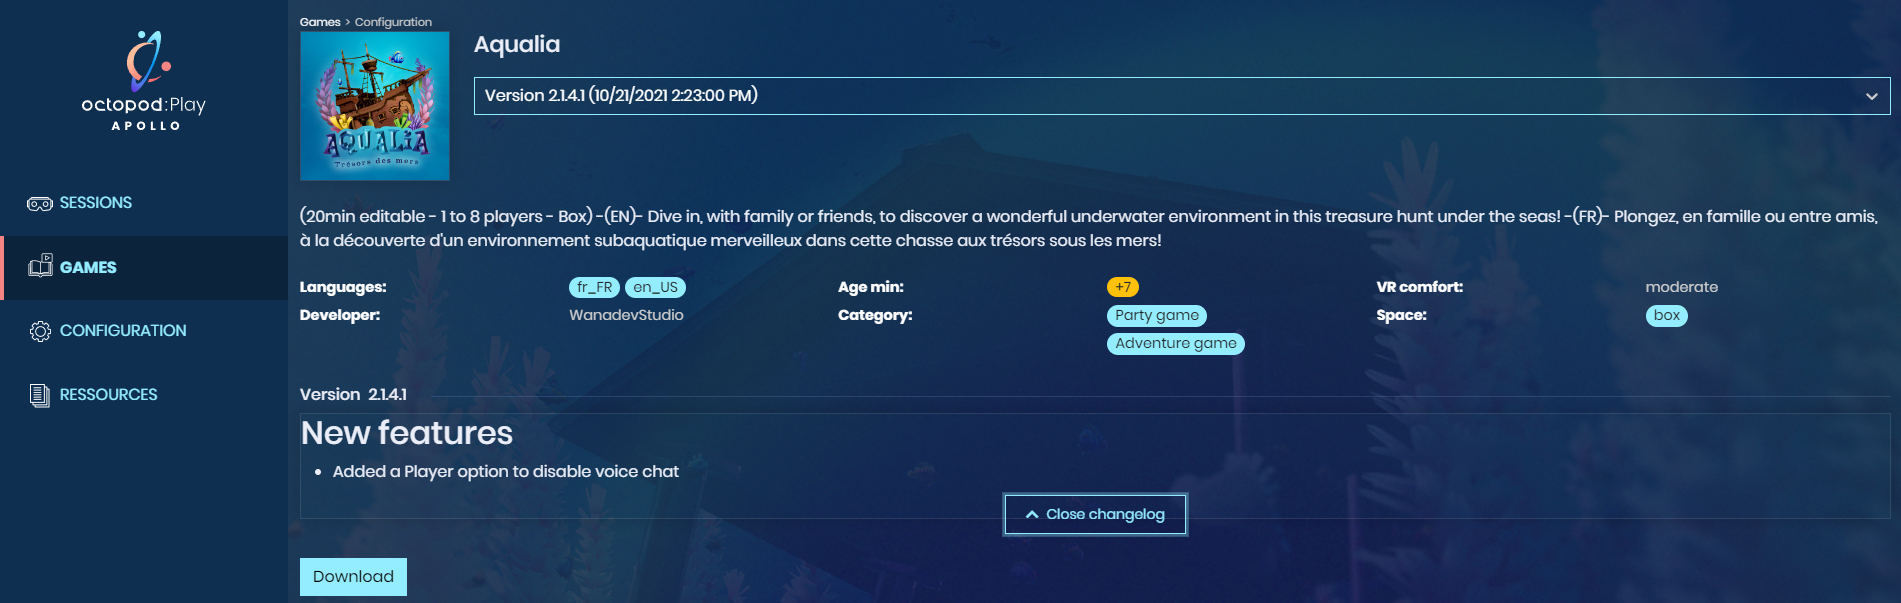
First, you can choose the version you want to download (the latest, most up-to-date, is selected by default).
You can then click on "Download".
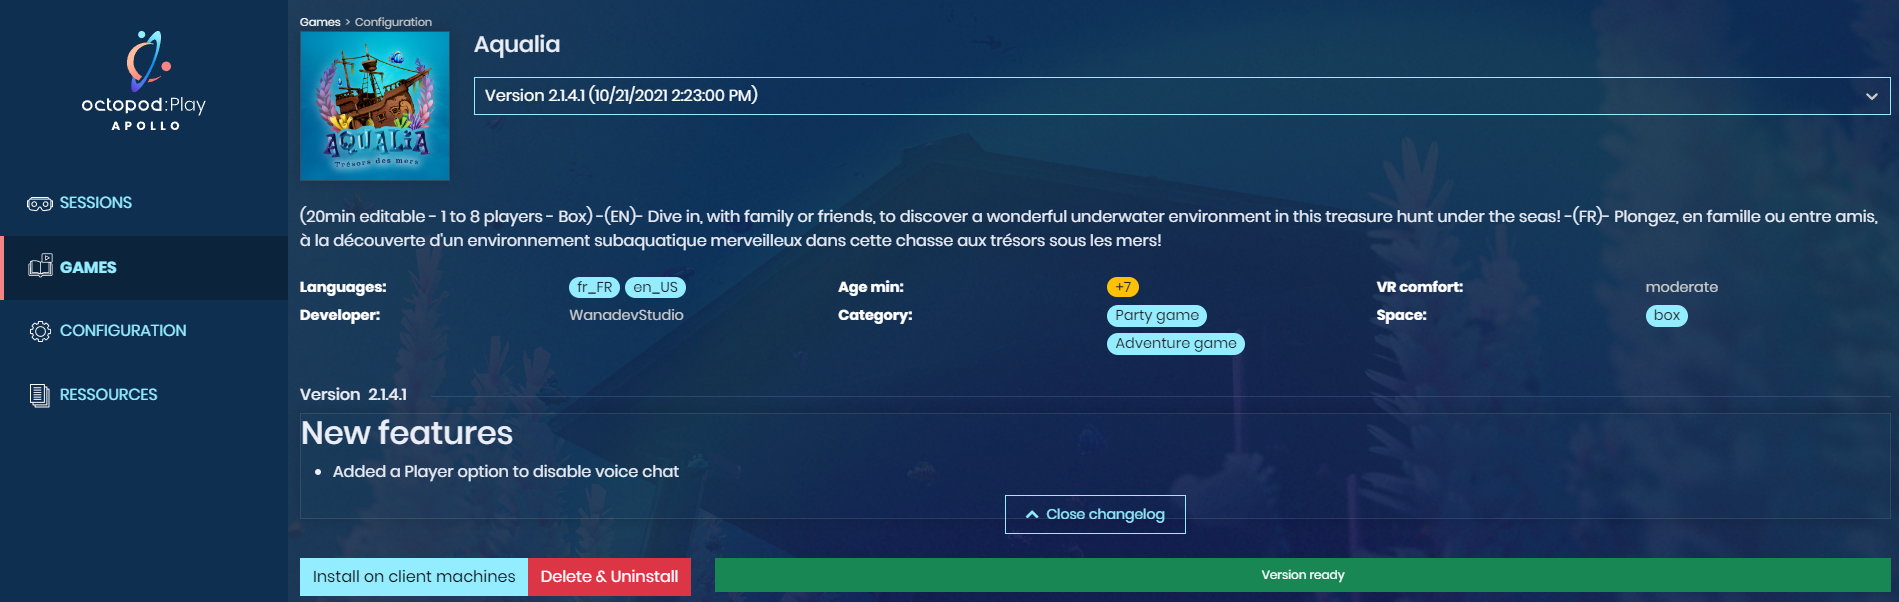
When finished, the bar will be green to indicate that the download is complete. You can click at any time on "Install on machines".
By clicking on this button, all the machines connected to Octopod will be the installation of the game and the selected version.
Once the download and installation on all machines is complete, you should have the status Installed on all your machines.
If you have this logo: ![]() it means that an update of a game is available. We recommend that you update as soon as possible, during a slow period.
it means that an update of a game is available. We recommend that you update as soon as possible, during a slow period.
It is also highly recommended to keep the old version, so that you can quickly go back to the new version if you have any problems. To save space on your disk, you can delete the oldest versions at each release, by clicking on the "Delete & Uninstall" button.
Please check the version to be removed beforehand, so as not to uninstall current versions.
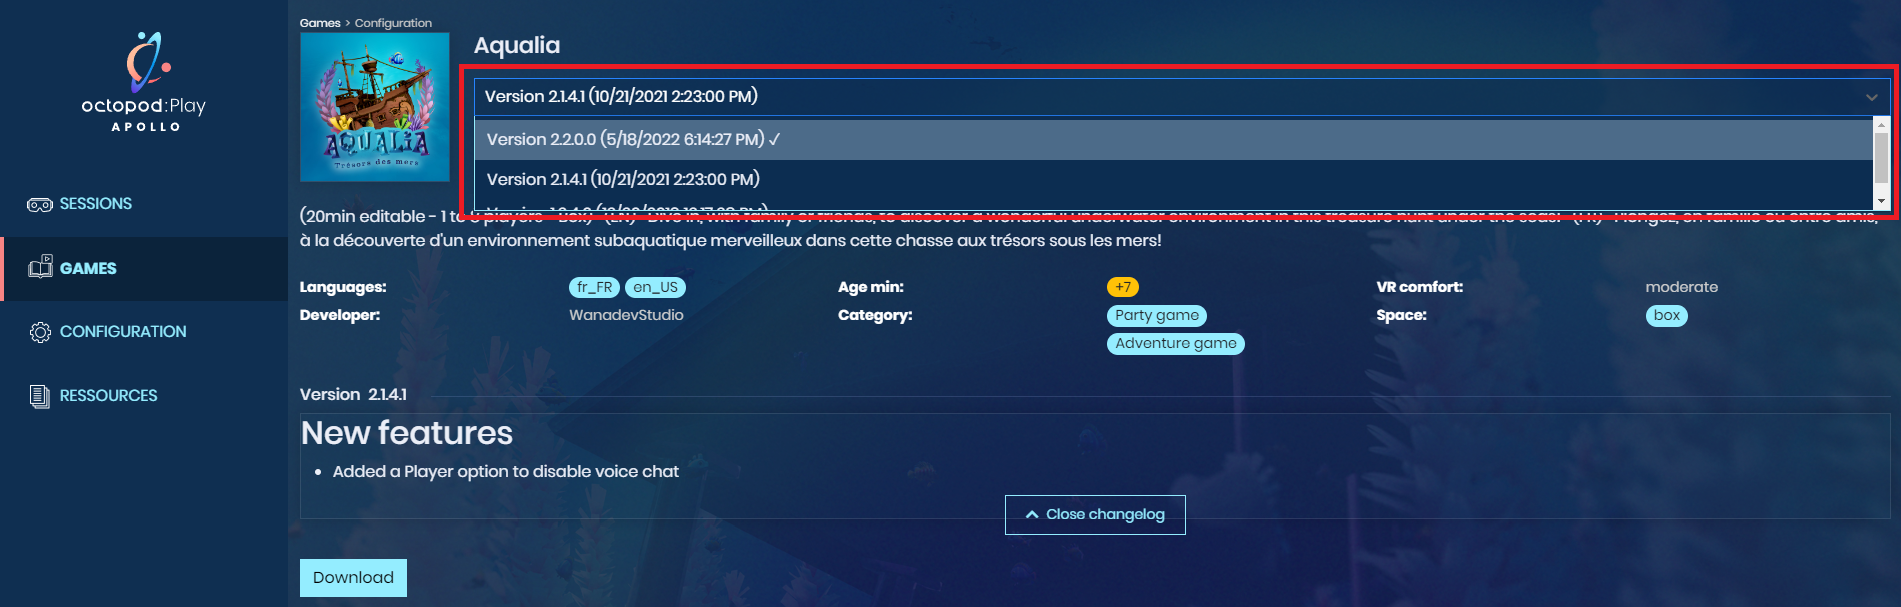
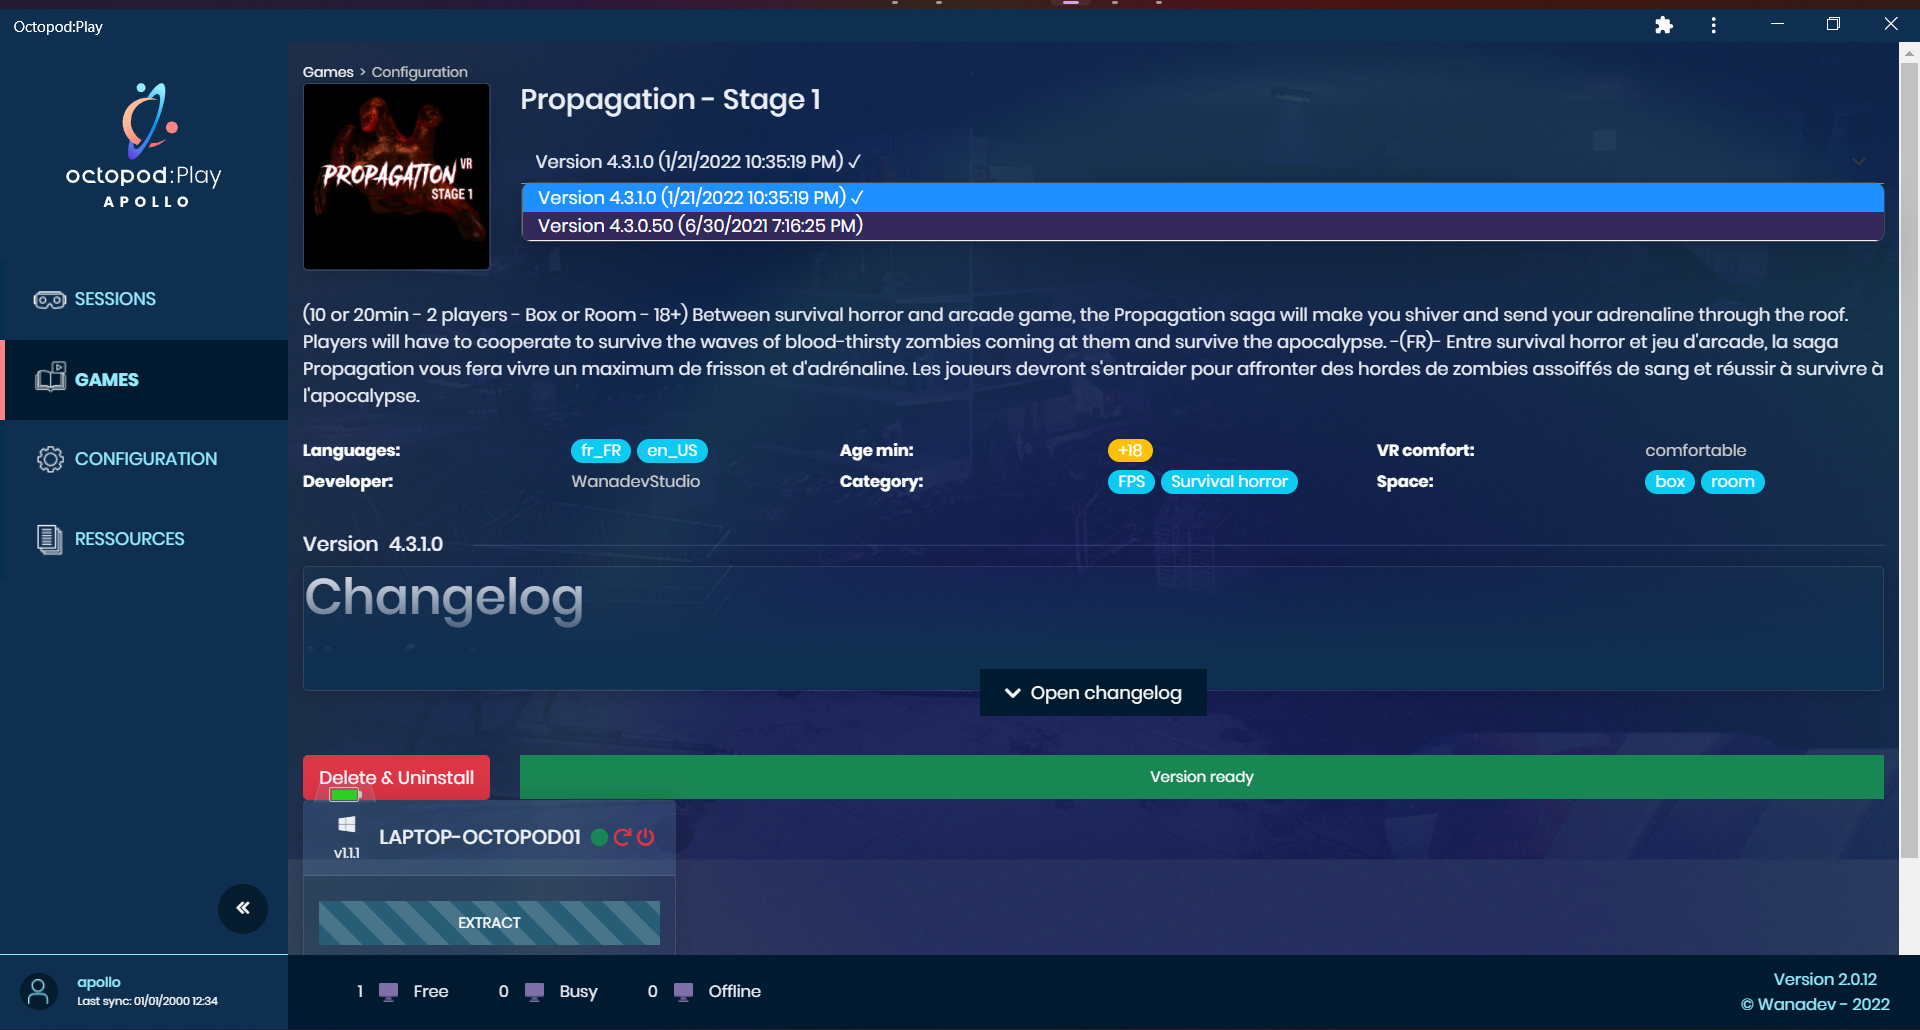
Check the number of versions of the games you have installed
On Octopod:Play, in the Games tab, while browsing through the different games, you can check the versions that are installed or not on your machine. Do this by clicking on the version number and scroll down the list. The presence of a small check mark to the right of the version means that this version is installed on your machines.
In this example, version 4.3.1.0 is installed on our machines. On the other hand, version 4.3.0.50 is not.
Delete versions you don't use
In most cases, the use of a game is limited to the use of one of its versions (except in the case of testing a new update or other exceptional cases). We therefore invite you to delete the versions that you do not use. In the game tab of Octopod:Play, once a game is selected, you have the possibility to select a version (the drop-down list is available by clicking on the version number). Once the version is selected, you can remove it by clicking on the "Remove & Uninstall" button. By doing so, the version will be removed from all machines configured with this launcher (launcher machine, player and server).
Configuration tab
Manage your machine park
When you click on the "Configuration" tab, your machine park appears on the screen like this:
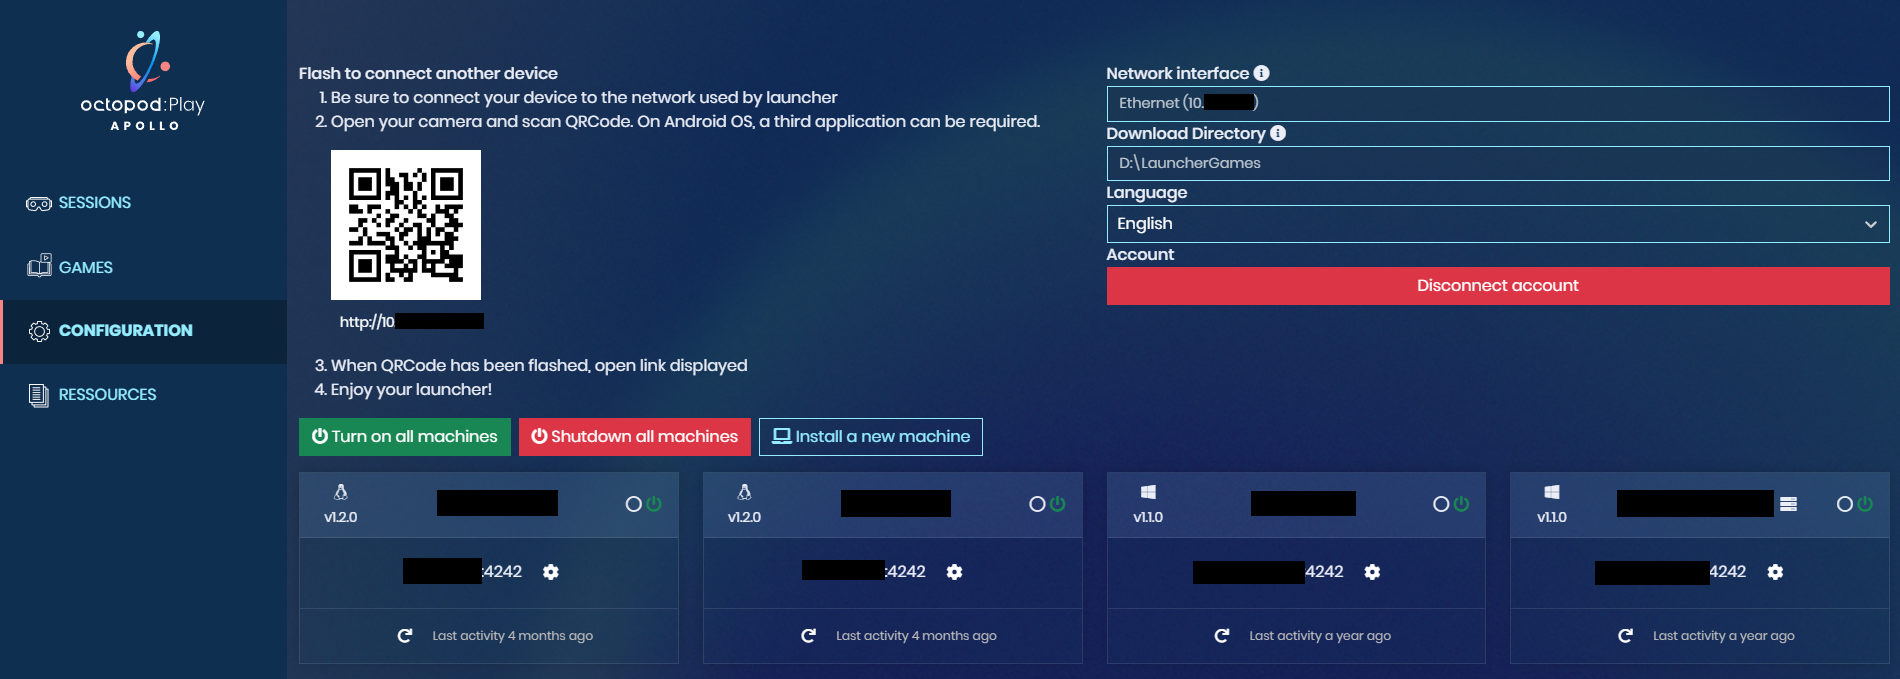
In this tab, you will have several possibilities:
- Turn on and off all the machines of your park with the buttons "Turn on the machines" and "Turn off the park" but also individually with the 3 logos turn on, turn off, restart above each machine.
Beforehand, you will have to set up your machines so that they can be managed remotely. To do this, you must activate the Wake-on-LAN option, see step 7 of the installation guide.
Take control of a machine with the "Connect" button.
Change the location of the launcher games
Read the part "Change the location of the games" in order not to lose your data).
From the cogwheel on each of the machines, you can:

Configure the name of the machines displayed in your Play Space Define a machine as a server (allows this machine to be displayed in priority when selecting servers) Change manually the location of the games.
read the part "Change the location of the games" document in order not to lose your data.
In the upper left corner of the machine's card, you will find the operating system logo and the version number of the daemon.
Use the multi-access point
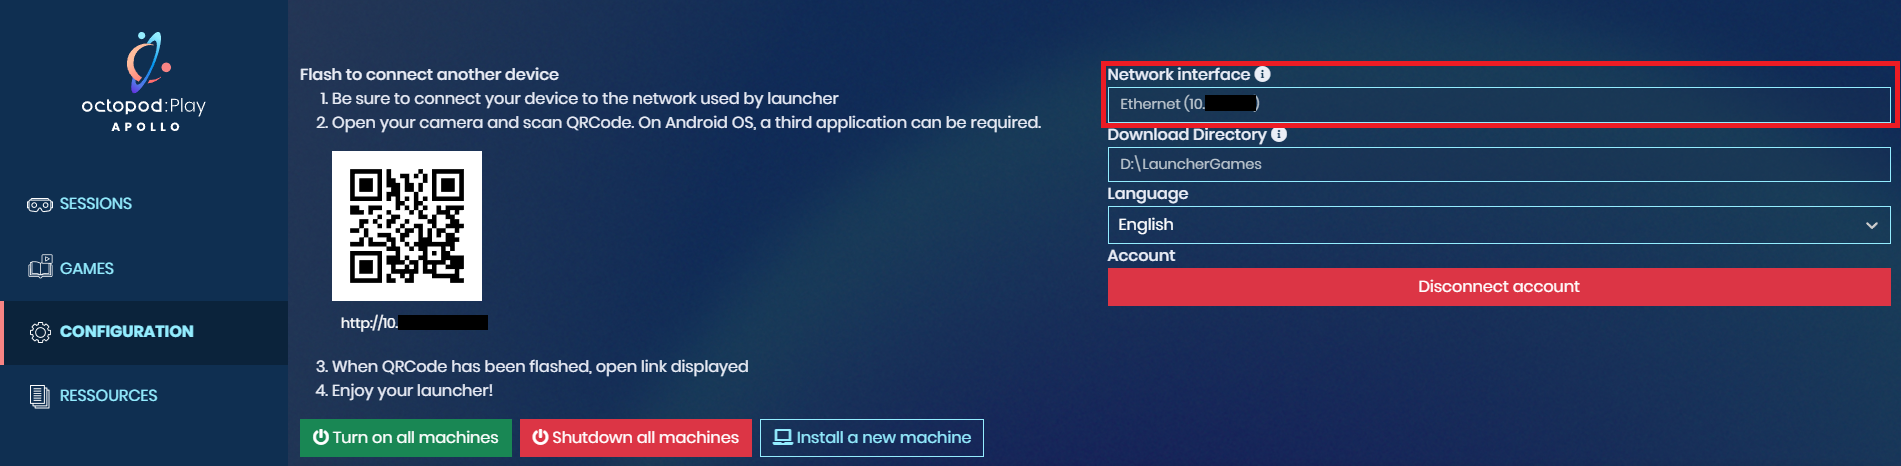
The multi-access point is a feature allowing remote access to the launcher installed on your PC GM (game master). It allows, from a smartphone or a tablet, to have access to the same options as on your computer.
To do so, you just have to scan with your Google Lens application on Android, or directly from your camera on Apple smartphones, the QR code of your launcher.
From another computer, you can also access it by indicating from a tab of your browser, in the URL, your IP launcher address followed by:3000 Example :

You will find your IP launcher address right next to the QR code:
Ressources tab
Documentation and game guide:
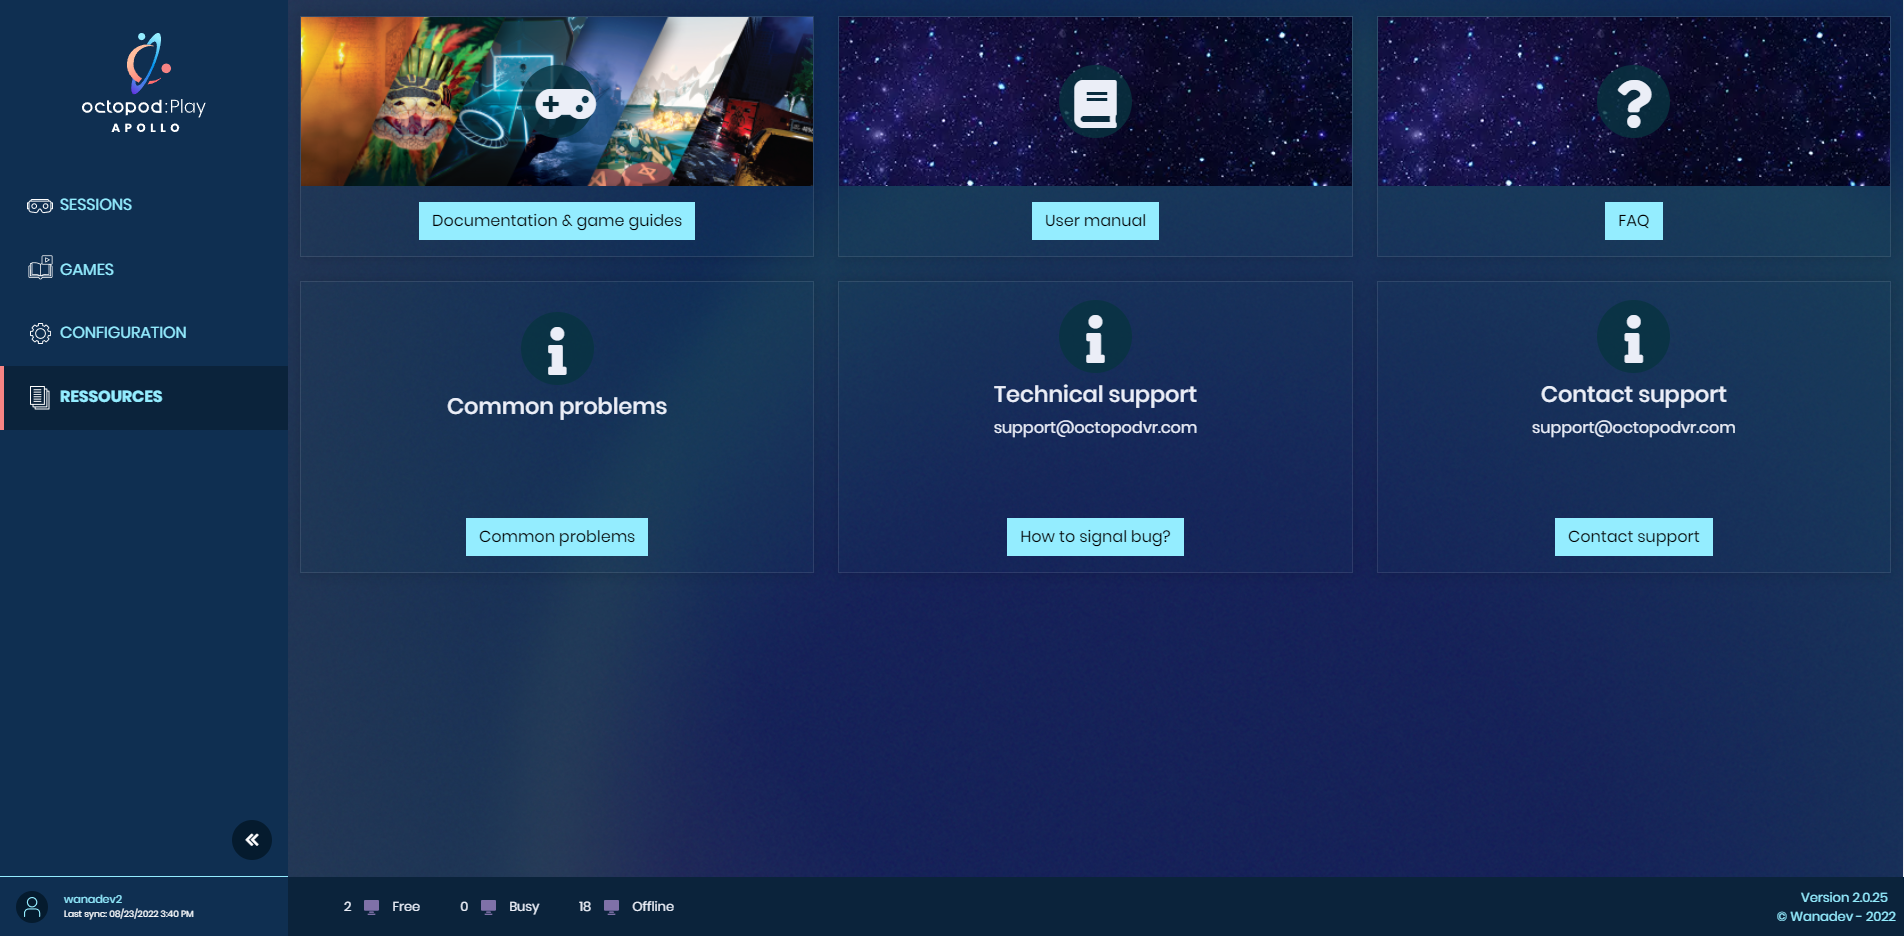
In this first very important tab, you will have access to the Documentation page of Octopod:Insight.
This page contains all the documentation related to Octopod:
Games Guides: 1 game guide per game All useful information Allows to appropriate the games
Communication packs: 1 per game Videos and images (web & print) Available for your multichannel communication
Installation guide: From the creation of your account to the launch of your first game, everything is explained!
User’s manual: A complete guide on the Octopod:Play launcher, allowing you to understand all the available options, put at your disposal for your operating comfort.
Common problems: A list of common problems, allowing you to consult and solve your problem quickly and efficiently without the help of technical support
How to report a bug: The procedure to follow so that we can efficiently process your support request.
Support
For any technical problem concerning the Octopod Play software, please contact us.